How the Notion API Powers My Blog
Hello and welcome to the new coryetzkorn.com! If you’ve been following me for a minute you may notice this site is actually four years old, which is a long time in internet years. I thought about redesigning it, but ultimately felt the design was still serving its purpose. Instead, I decided to refine both the design and the tech stack powering it.
The change I’m most excited about is my new Notion-powered blog. There’s no longer any raw markdown, no content management system, and no code required to publish a post. This is because my entire blog is now a single Notion database.

Publishing a post is as simple as creating a new entry in the database, filling in a few database properties, and writing the post. That’s it!
If you’ve ever maintained a blog, you’re probably familiar with how quickly things get out of date. Two years pass without a single post and you begin questioning why you even have the thing. Tweeting is so much easier. And you get likes!
The main reason I’m excited about my new Notion-powered writing experience is because I think I’ll actually use it. I spend all day in Notion (and work at Notion) writing docs and filing away ideas. Now my blog will live in the same tool. If something is worth sharing publicly all I have to do is drag a few blocks into my blog database and — BOOM — we’re live!
Now let’s dive into how this all happens. And fair warning, my implementation does require some rather advanced JavaScript programming, but there are also no-code solutions out there if that’s more your jam.
Creating the Notion Database
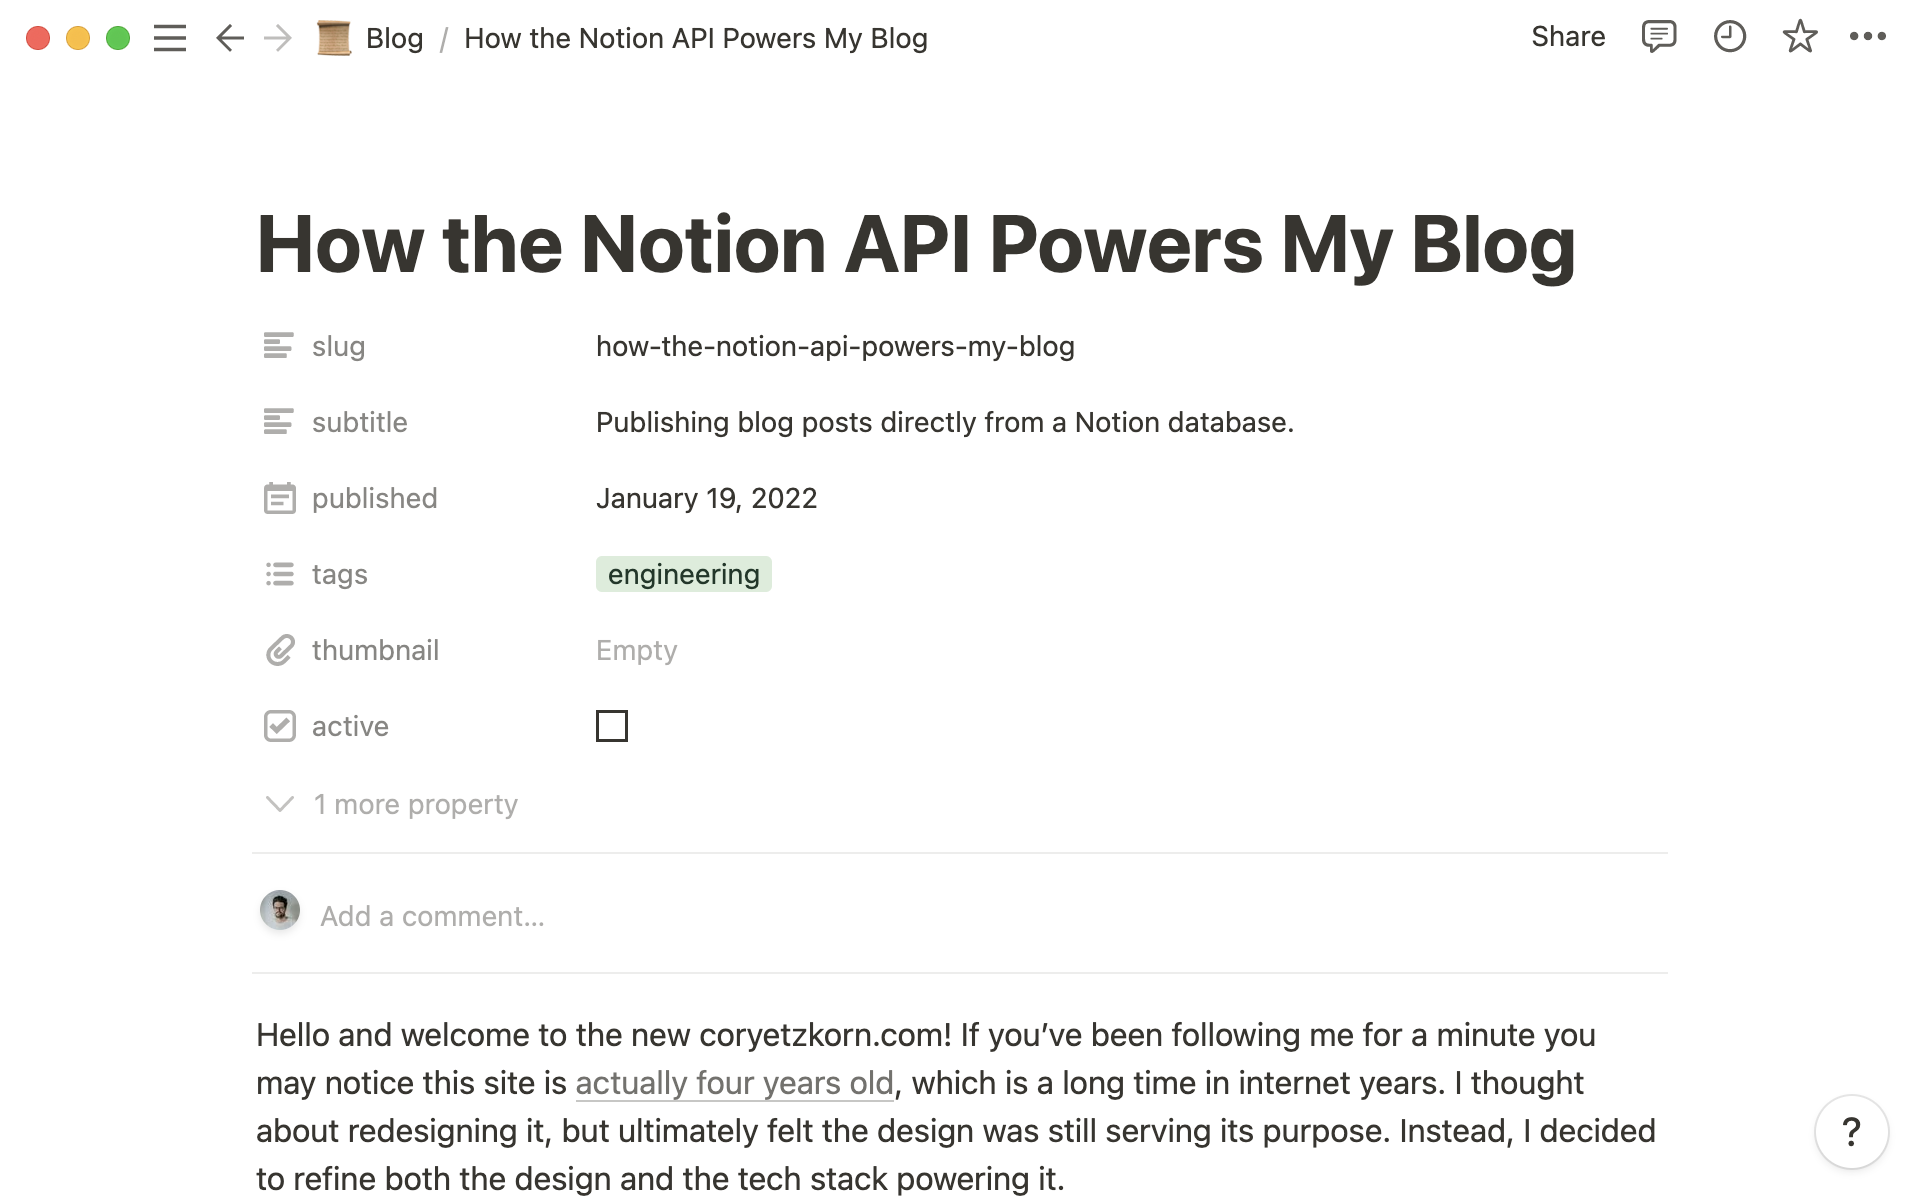
I began by creating a table-view Notion Database to represent my blog. Next, I defined a set of database properties to hold important metadata. The properties I added were:
slug— the blog post URLsubtitle— some teaser text for postspublished— the date the post is publishedtags— a multi-select field with a set of tagsthumbnail— a media field for social meta thumbnailsactive— a checkbox field that determines whether the post appears on my live site
The rest of the post is totally freeform and managed by the Notion editor. Everything is drag-and-drop.
Duplicate a copy of my blog database here.
Importing Existing Content
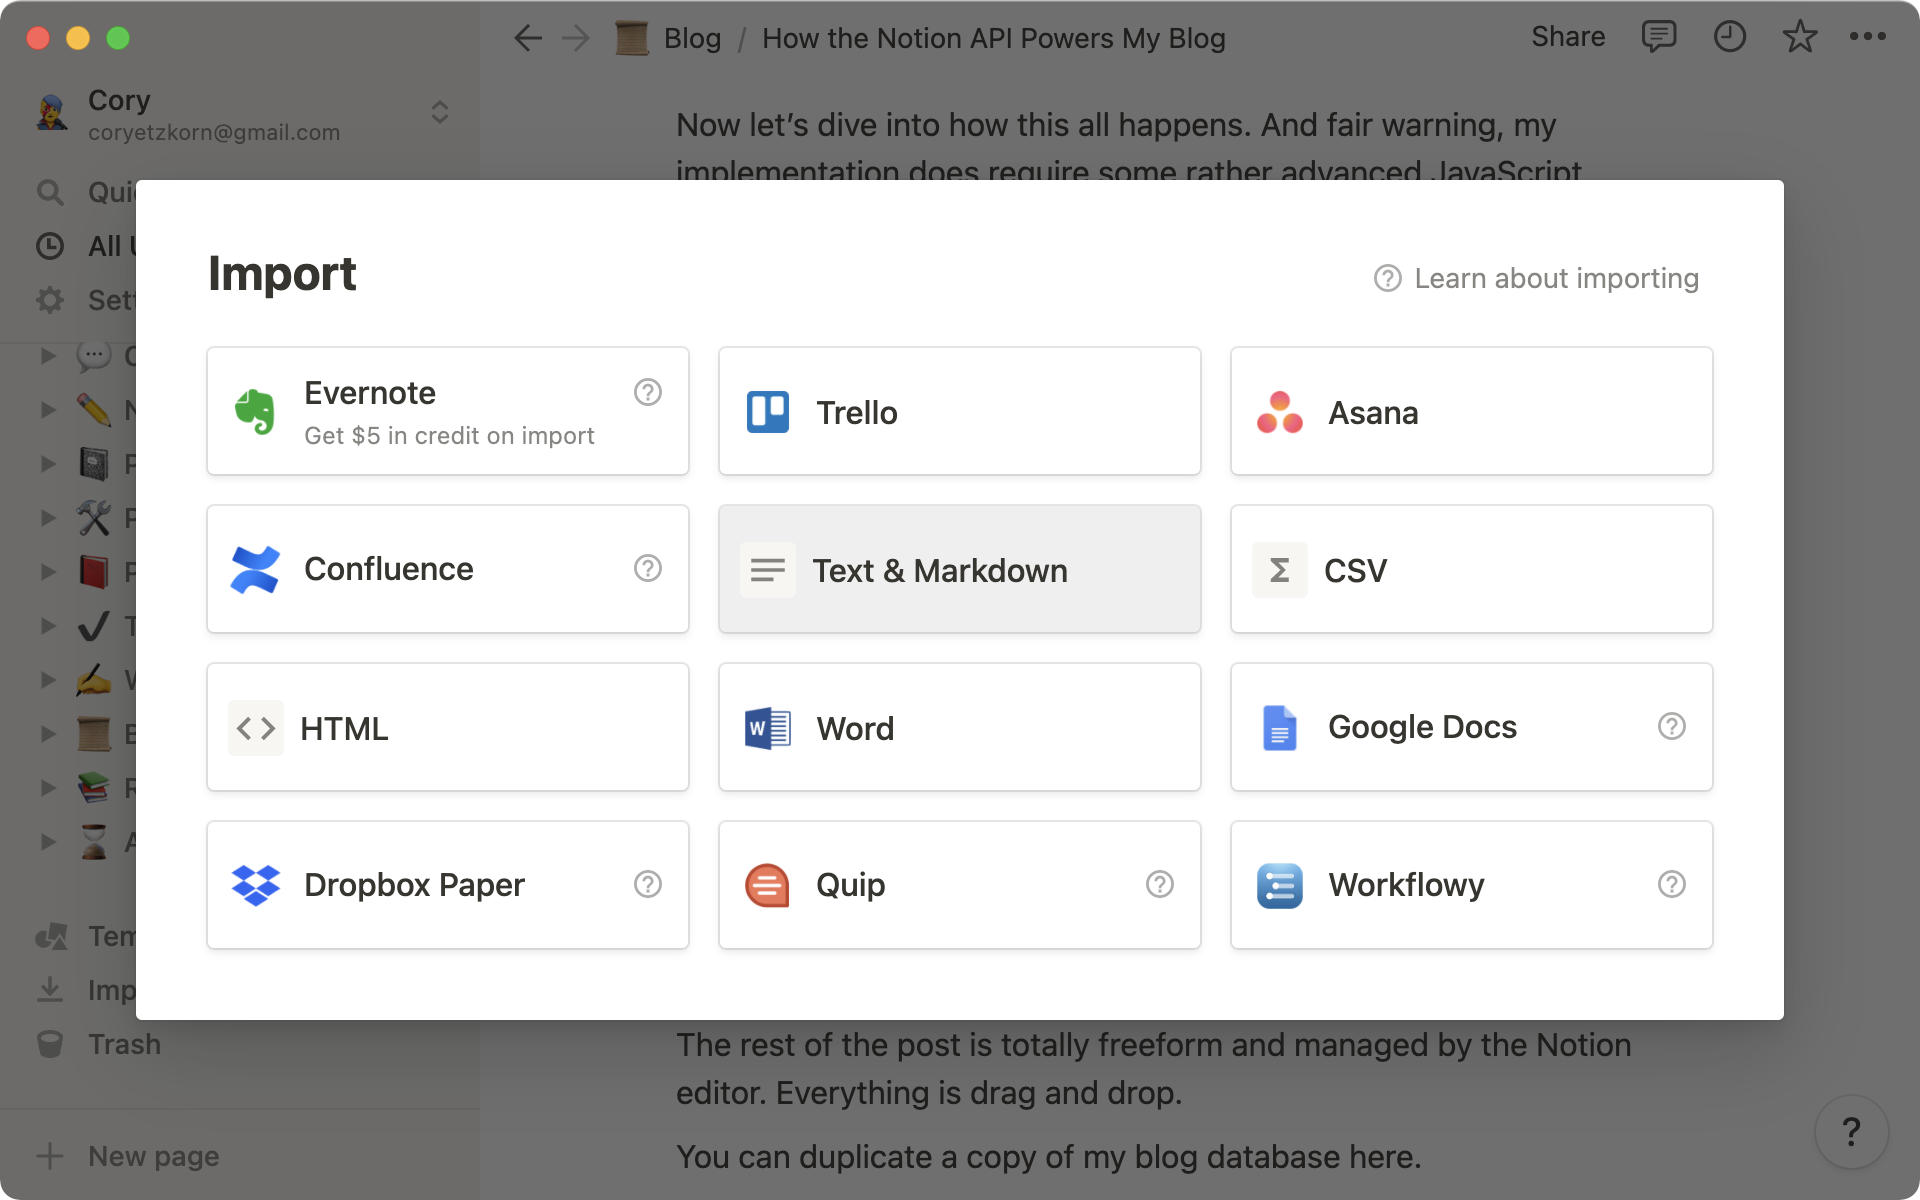
Since I was migrating an existing blog, not starting a new one, I had to consider how to bring over old posts. Luckily, my previous blog was powered by Jekyll and markdown. This made importing existing posts mostly painless. Notion has a powerful markdown import tool. It was as simple as importing the markdown files, dragging them into my blog database, and adding relevant database properties.
Building the HTML Template
Now for the harder part that involves code! My blog has a unique design that involves grouping posts by year. There’s no service that exists that would automatically create this layout.
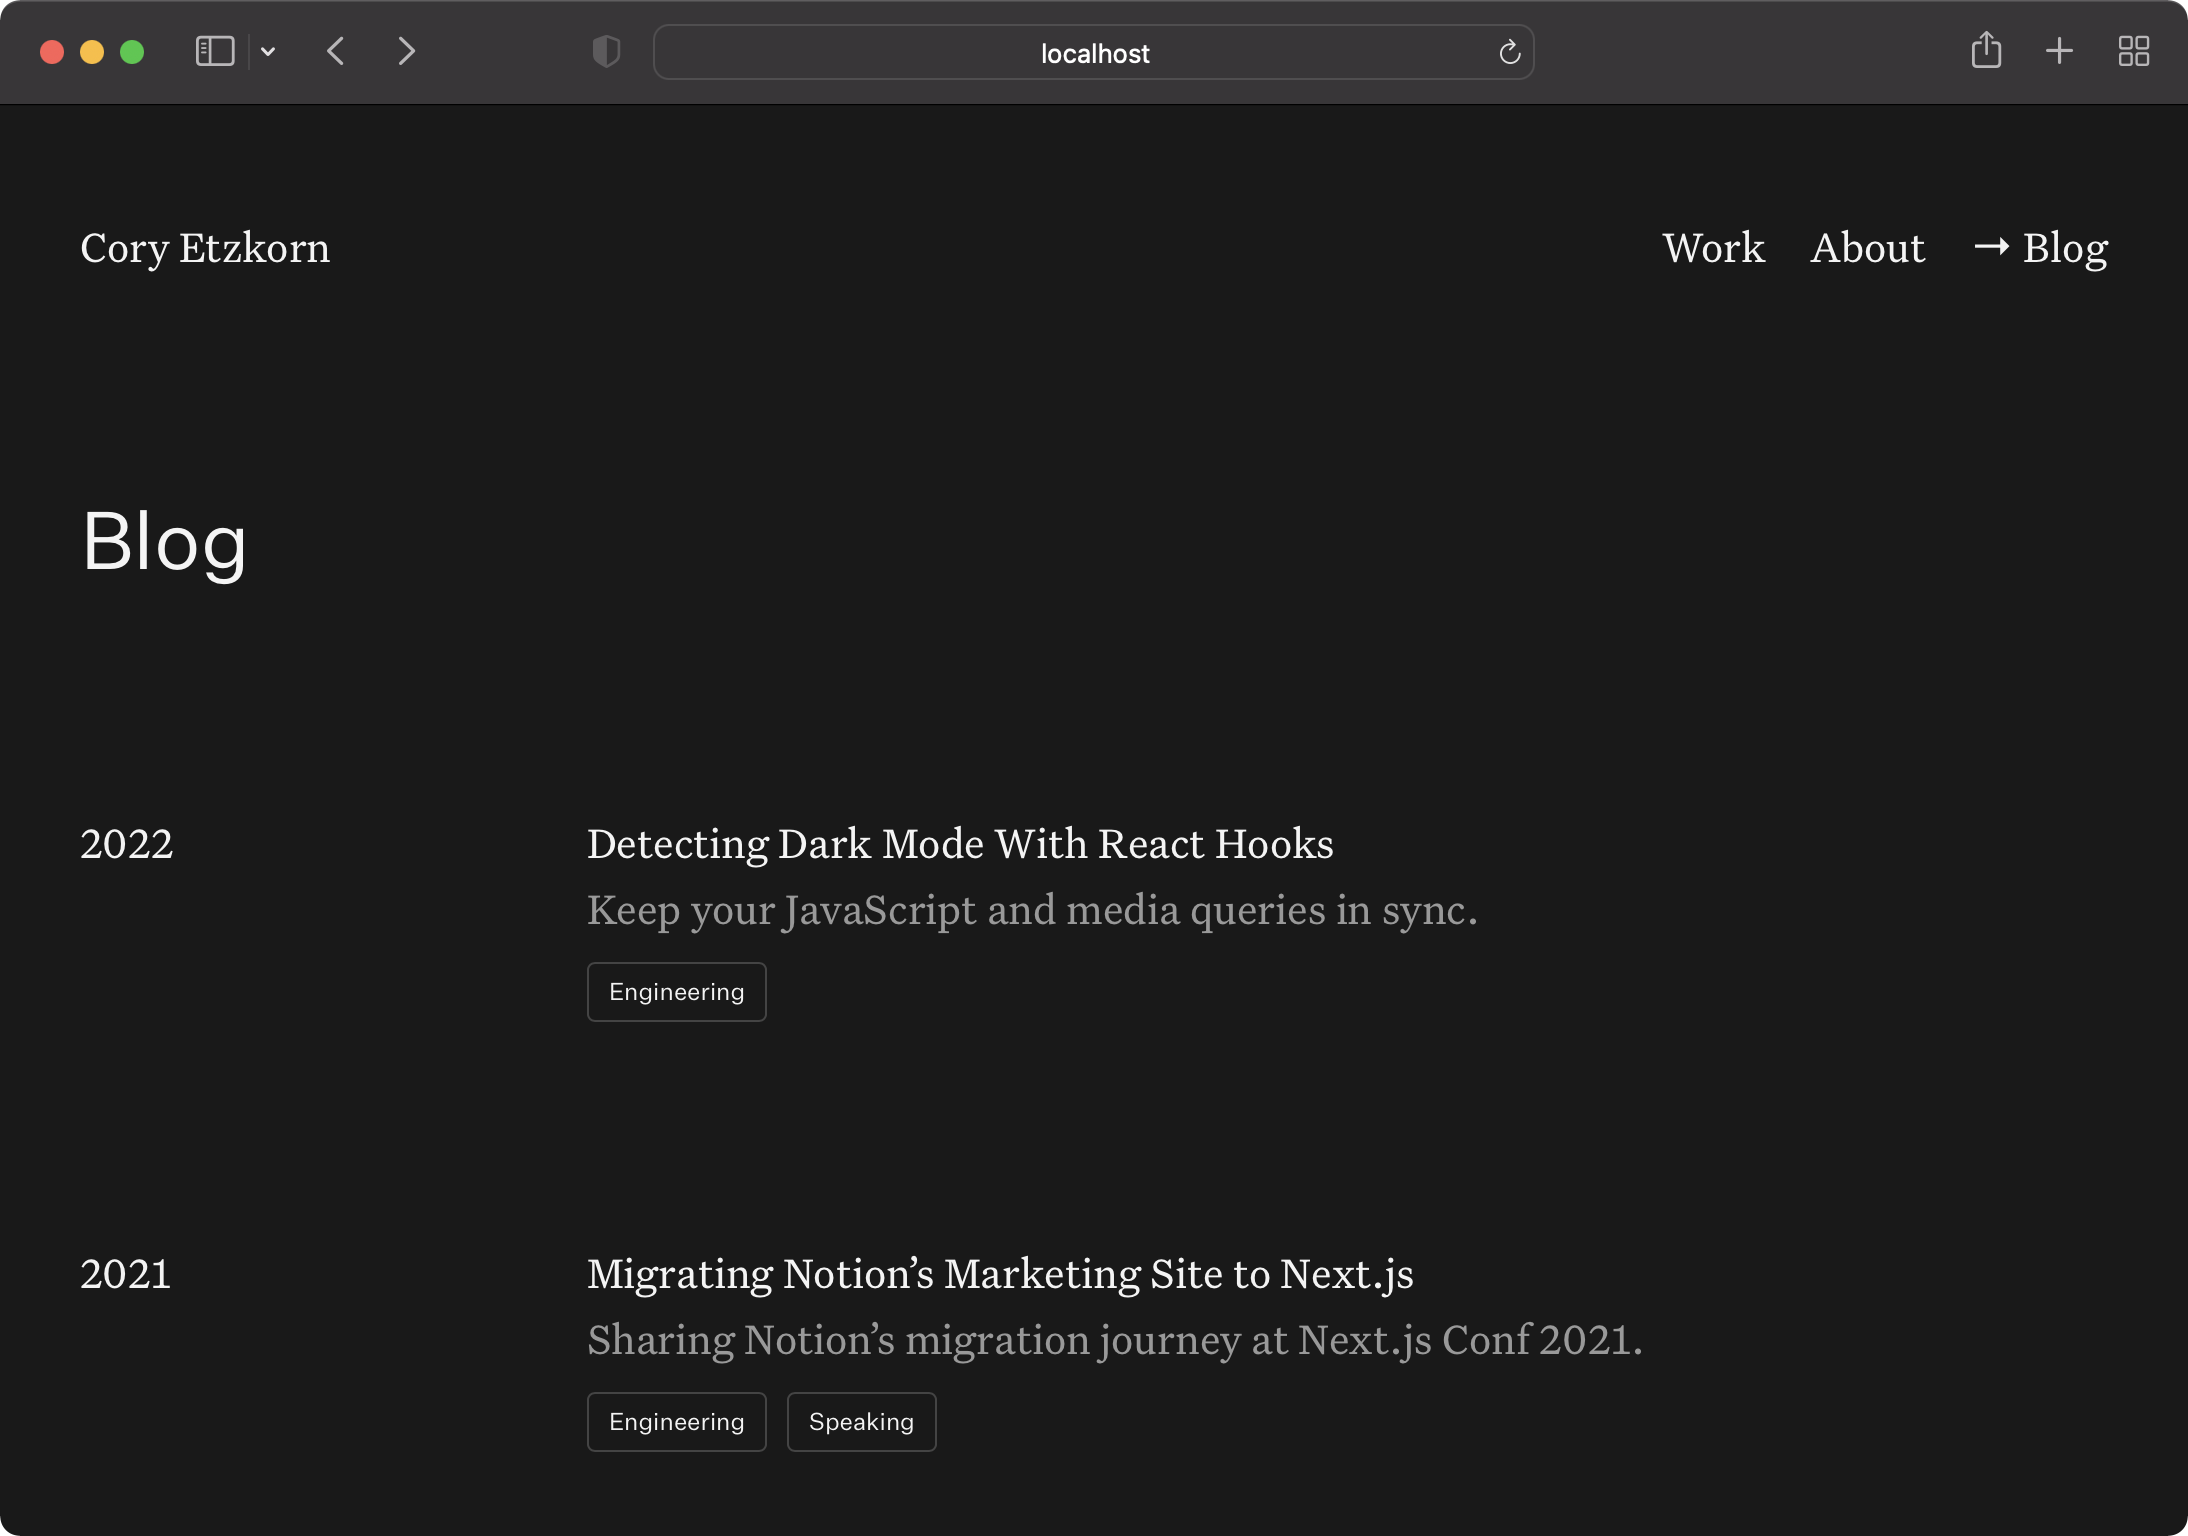
The actual blog templates are 100% custom and are built with:
- Next.js — the static site generator powering the entire site
- TypeScript — the language my site is written in
- The Notion API — my content source
I’m not going to get into the super technical bits of how I built this specific layout, but there are tons of great starter codebases out there that will help kickstart a Notion / Next.js integration of your own. I recommend Travis Fischer’s Next.js Notion Starter Kit.
Working With the API
The Notion API is where all the magic happens. It’s what allows me to pipe content directly from my Notion database and transform it into a beautiful custom blog.
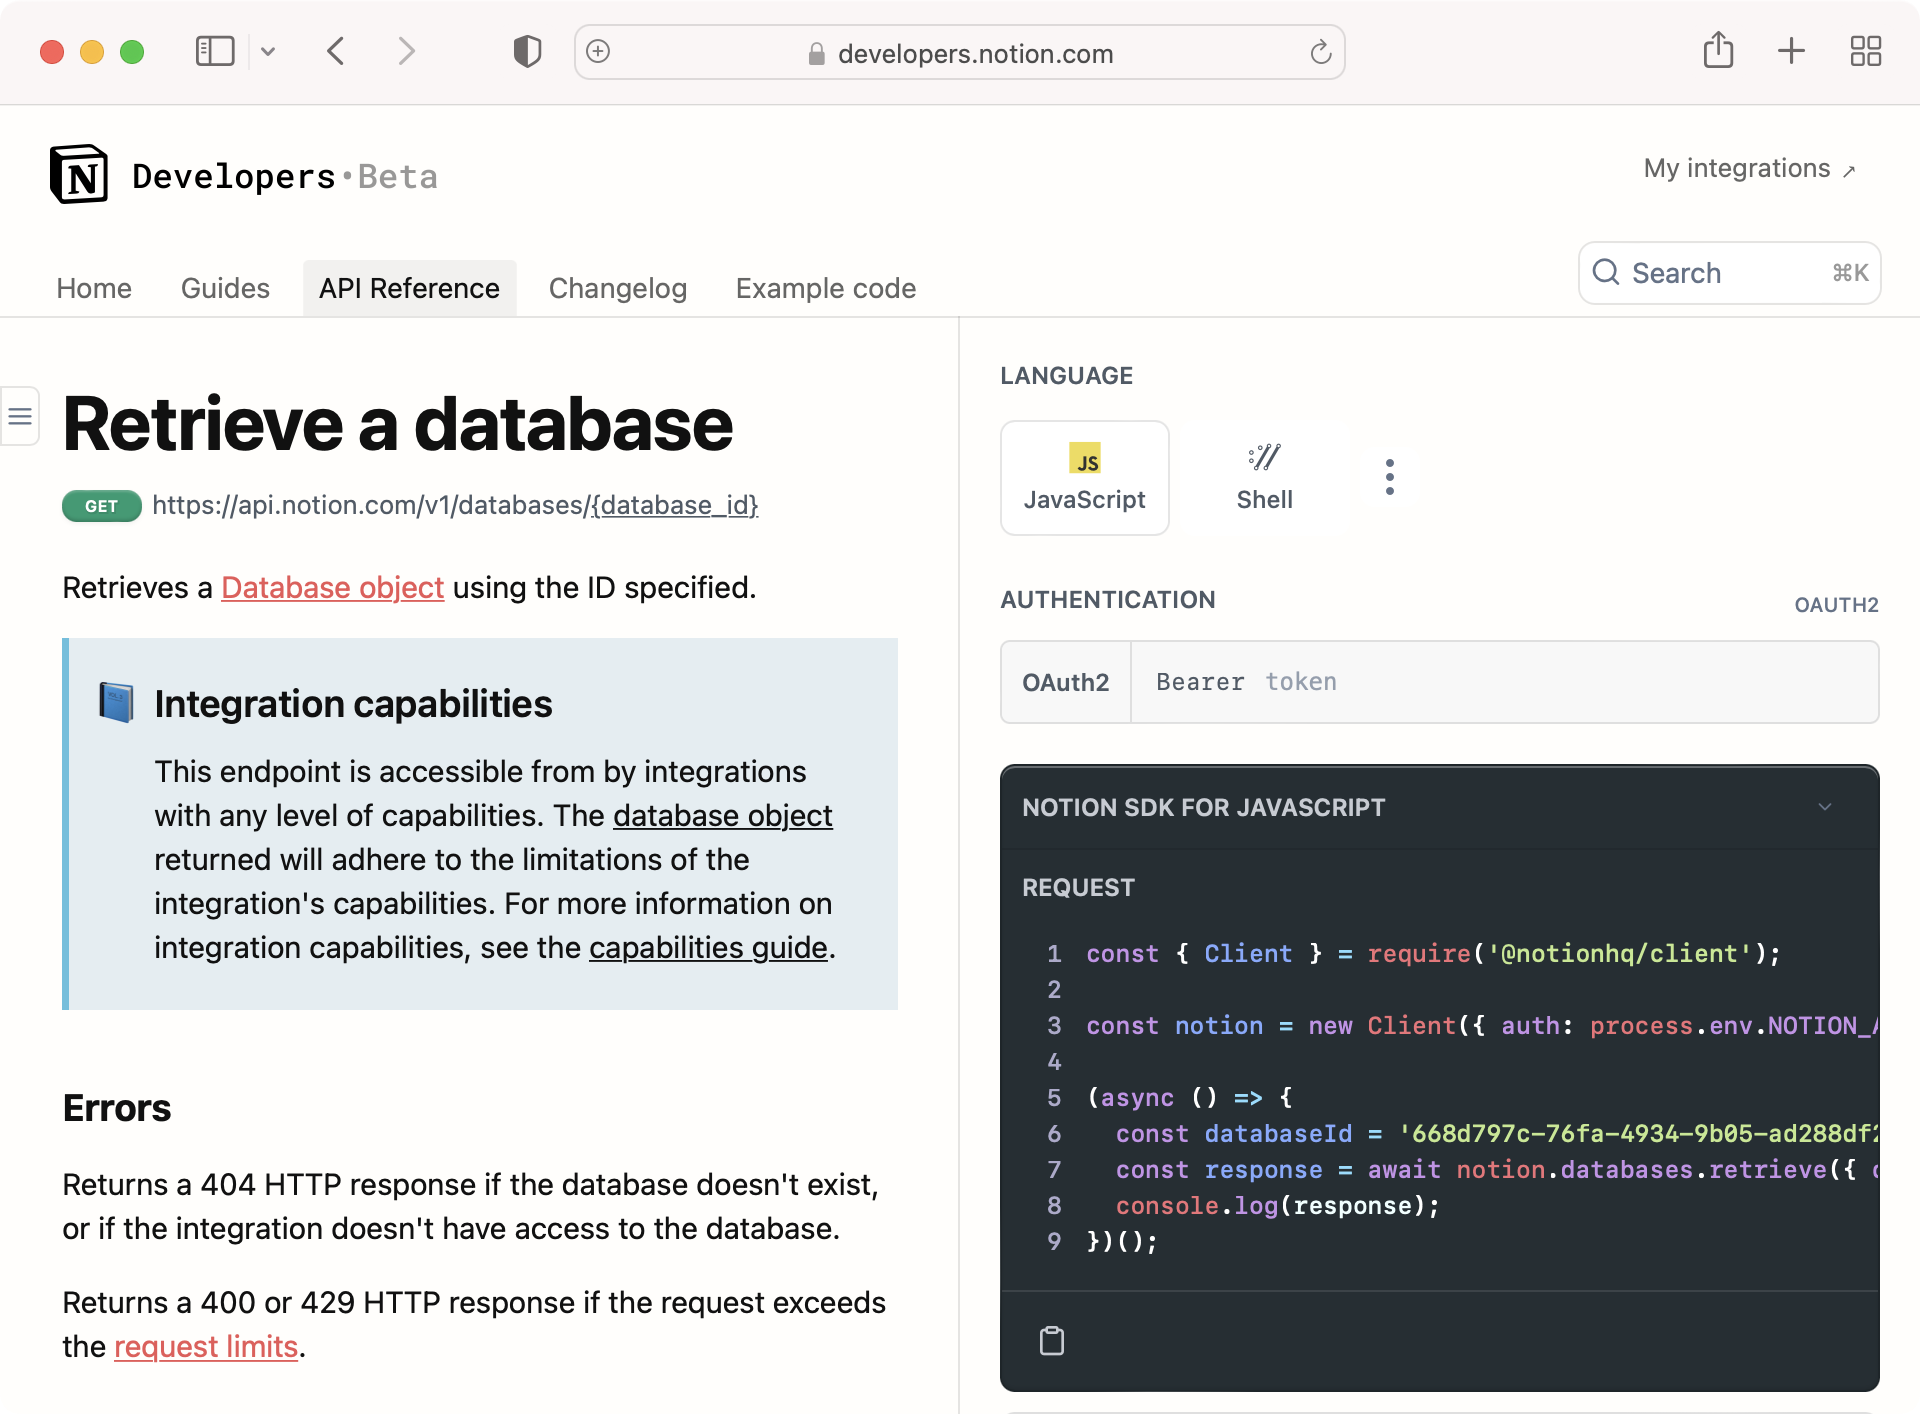
I started by installing the Notion JavaScript SDK. After configuring a few API keys, the SDK makes querying content straightforward.
For example, getting a list of blog posts from my database is just a few lines:
export const getPosts = async () => {
  return await notionClient.databases.query({
    database_id: process.env.NOTION_BLOG_ID,
    sorts: [
      {
        property: "published",
        direction: "descending",
      },
    ],
  })
}
From there I can easily loop over the response data and generate a list of posts sorted in reverse chronological order.
I can also use this data to tell Next.js which static paths to generate for each of my posts. I iterate over the posts, grab the slug property, and return an array of post URLs:
import { compact } from "lodash"
import { getPosts } from "@helpers/postHelpers"

export async function getStaticPaths() {
  const posts = await getPosts()
  const postSlugs = compact(
    posts.map((post) => {
      if (
        post.properties &&
        post.properties.slug &&
        post.properties.slug.rich_text
      ) {
        return `/blog/${post.properties.slug.rich_text[0].plain_text}`
      }
    })
  )
  return {
    paths: postSlugs,
    fallback: "blocking",
  }
}
Nice! I’ve now generated my main blog index page as well as the paths for each post. Now I just need to render the content for each post.
This is a bit more complex for a few reasons:
- My blog URLs have the format
/blog/:nice-sluginstead of/blog/:id. This means I first have to write a database query to convert the slug (a database property) into a Notion page ID. - Once I have the page ID, I also need to write a query to grab all of the page’s child blocks.
// Get a Notion database page by ID
const getPost = async (id: string) => {
  return await notionClient.pages.retrieve({ page_id: id })
}

// Get all child blocks given a parent page ID
const getPostContent = async (id: string) => {
  const baseQuery = {
    block_id: id,
    page_size: 100,
  }
  let results = []
  let postContent = await notionClient.blocks.children.list(baseQuery)
  results = [...postContent.results]
  while (postContent.has_more) {
    postContent = await notionClient.blocks.children.list({
      ...baseQuery,
      start_cursor: postContent.next_cursor,
    })
    results = [...results, ...postContent.results]
  }
  return results
}

export async function getStaticProps(context: GetStaticPropsContext) {
  // Grab the slug from the post URL
  const slug = context.params && context.params.slug
  // Get all posts from the Notion database
  const posts = await getPosts()
  // Find the post with a matching slug property
  const matchedPost = posts.filter((post) => {
    if (post && post.properties && post.properties.slug) {
      return post.properties.slug.rich_text?.[0].plain_text === slug
    }
  })[0]
  // Get the Notion page data and all child block data
  const [postData, postContent] = await Promise.all([
    getPost(matchedPost.id),
    getPostContent(matchedPost.id),
  ])
  // Next.js passes the data to my React template for rendering
  return {
    props: {
      postId: matchedPost.id,
      postData,
      postContent,
    },
    revalidate: 60,
  }
}
This is definitely a bit complex, but it all makes sense if you take it piece by piece. Everything would be simpler without the SEO-friendly post URLs.
Setting Up Preview Mode
You may have noticed the preview links at the top of my Notion database. These allow me to preview content before publishing using Next.js preview mode.
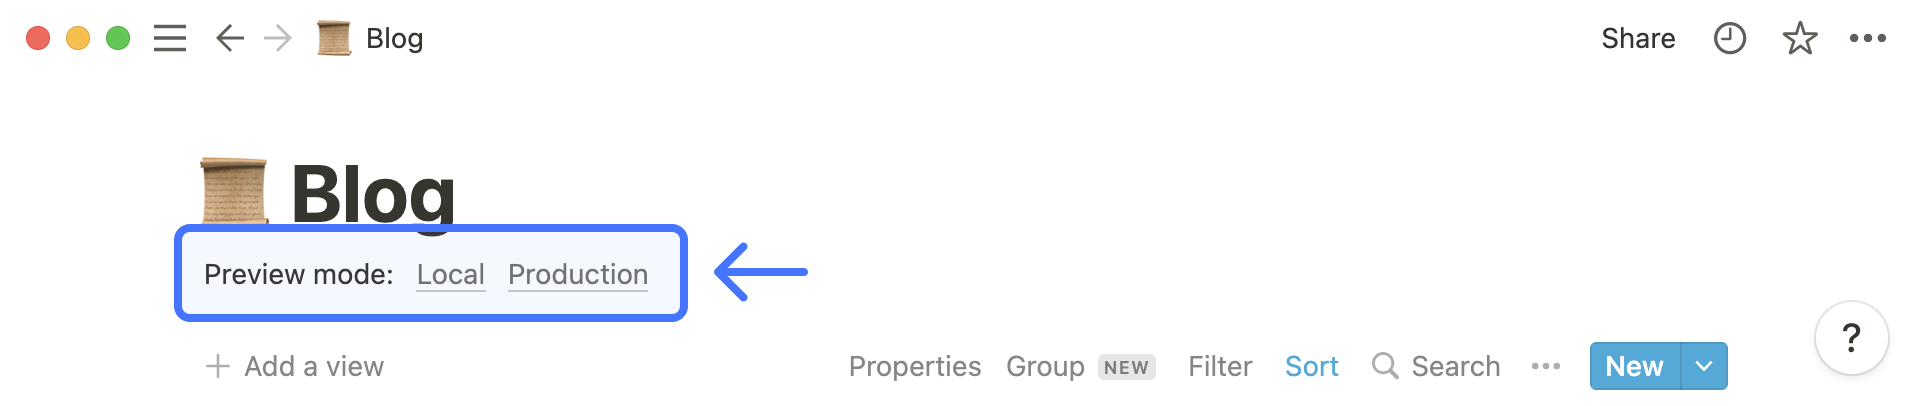
Preview mode can be triggered by visiting a secret URL. When active, pages are rendered at request time instead of at build time. I’m able to augment my Notion API query based on whether preview mode is active. Normally, I add a filter that only returns posts with the “active” database property. When preview mode is on, I disable this filter to let draft posts through.
import { compact } from "lodash"

export const getPosts = async (preview?: boolean) => {
  // Grab all blog posts from the Notion database
  const query = {
    database_id: process.env.NOTION_BLOG_ID,
    sorts: [
      {
        property: "published",
        direction: "descending",
      },
    ],
  }
  // Show ONLY active posts when preview mode is inactive
  // Otherwise let them through
  if (!preview) {
    query.filter = {
      property: "active",
      checkbox: {
        equals: true,
      },
    }
  }
  return await notion.databases.query(query)
}
Generating an RSS Feed
My previous Jekyll-powered blog included an RSS feed and I still think RSS is valuable. I was initially worried this would require a lot of extra work to generate, but it only took 15 minutes to setup.
I ended up using Jean-Philippe Monette’s Feed Module.
I call it directly from getStaticProps in pages/blog/index.tsx:
export async function getStaticProps(context: GetStaticPropsContext) {
  const posts = await getPosts({ preview: context.preview })

  // Generate RSS feed
  !context.preview && generateRSSFeed(posts)

  return {
    props: {
      posts,
      preview: Boolean(context.preview),
    },
    revalidate: 60,
  }
}
The generateRSSFeed() function takes my posts object, converts it to XML, and writes the file to the /public directory.
Check out Ashlee Boyer’s post to see the details of how this works. It’s essentially the default configuration with a few mods.
Hosting Images on AWS
One unexpected pain point of this migration was hosting images. File URLs (including images) returned by the Notion API currently expire after 1 hour. While this is a nice security feature, it makes generating a static site more complex.
There are essentially three options:
- Use
getServerSidePropsinstead ofgetStaticPropsto ensure a new and valid image URL is returned on each page visit. - Write a script that crawls all posts for image blocks, downloads the images, and places them in the /public directory.
- Use
getStaticPropsand incremental static regeneration to crawl an individual post’s blocks at request and upload the image assets to your own S3 bucket.
The first option was a non-starter because it would have meant completely forgoing the benefits of a static site. I ended up going with option #3, but it was a lot of work to implement. Unless you want to burn 8 hours, I’d recommend going with getServerSideProps for now.
Deploying to Vercel
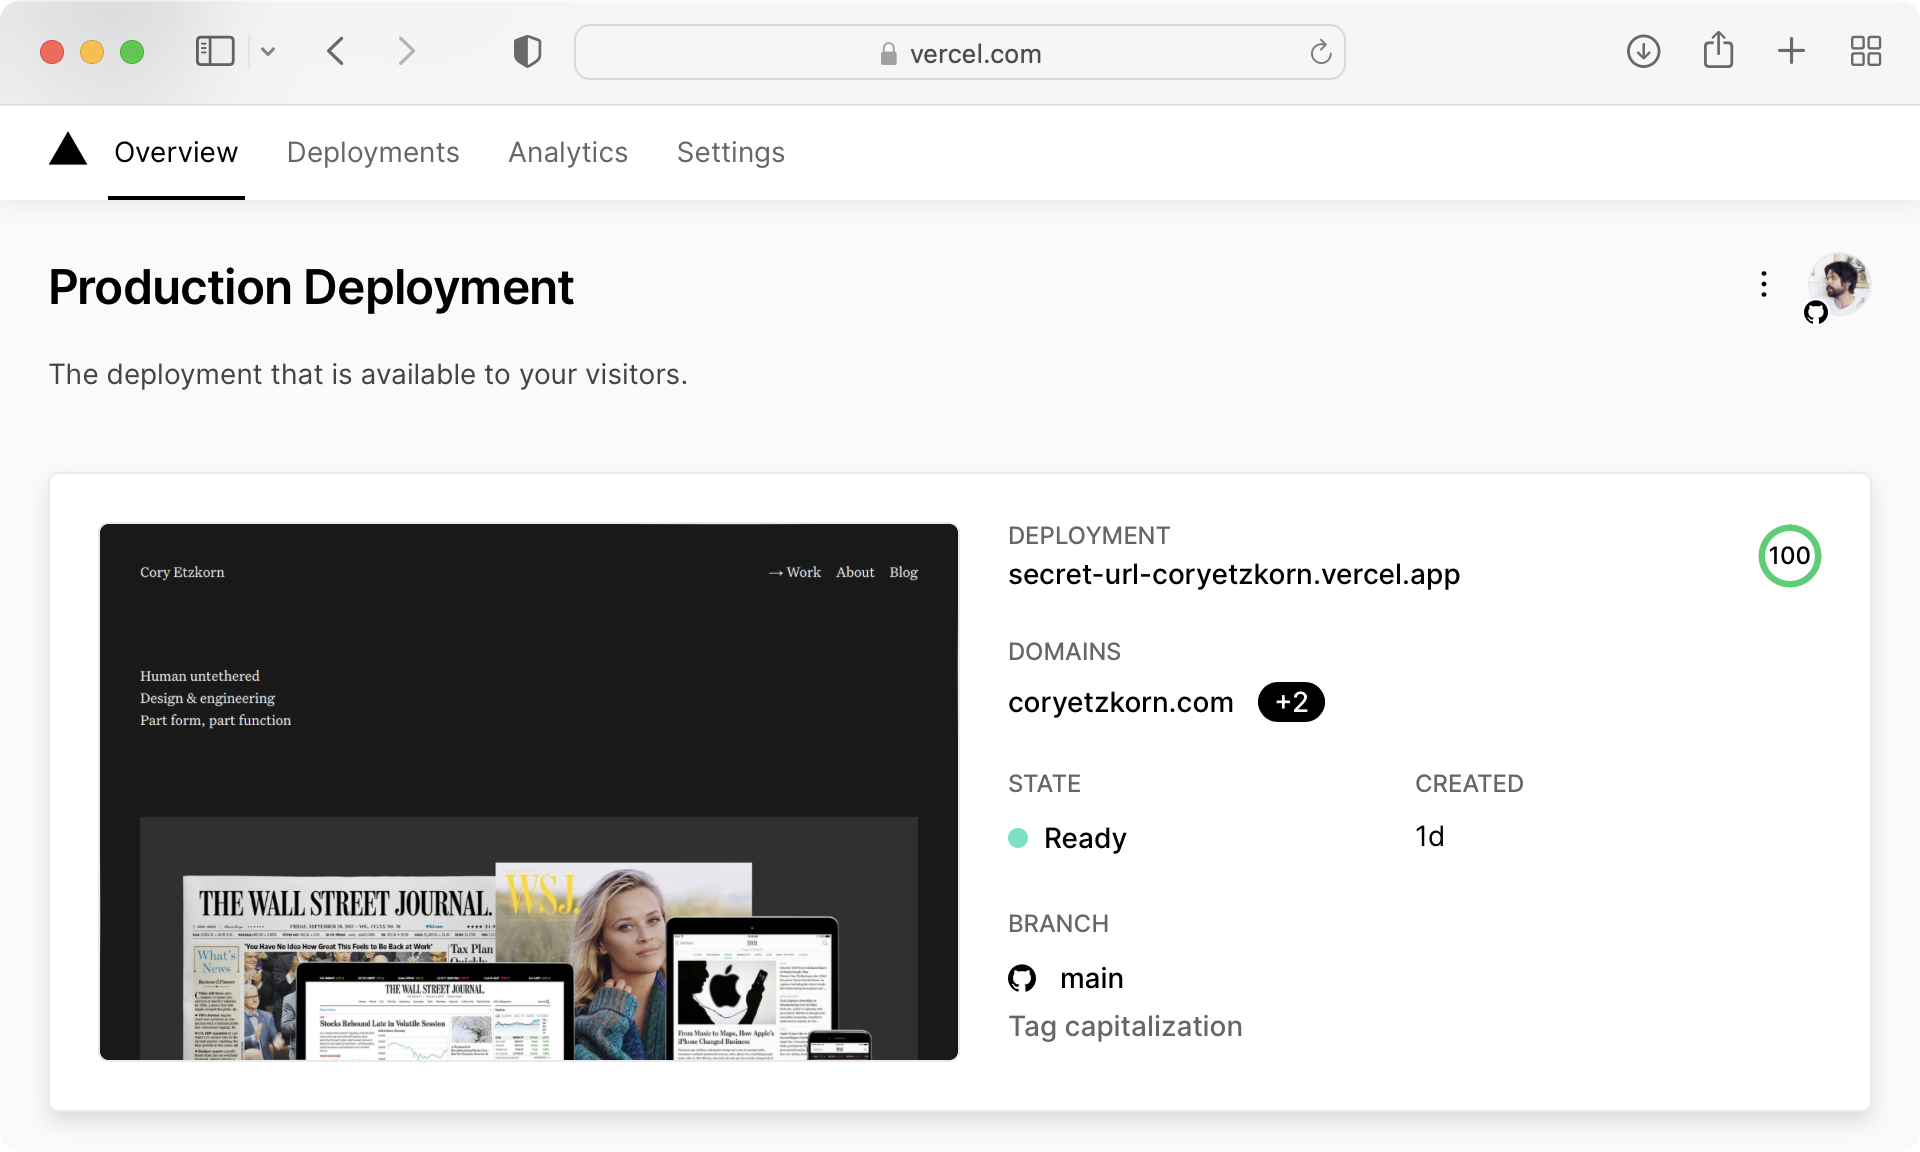
With this site update I’m finally saying goodbye to Jekyll and Netlify. They’ve both served me well for almost five years, but I’m excited to take advantage of all the Next.js goodies that come out of the box on Vercel.
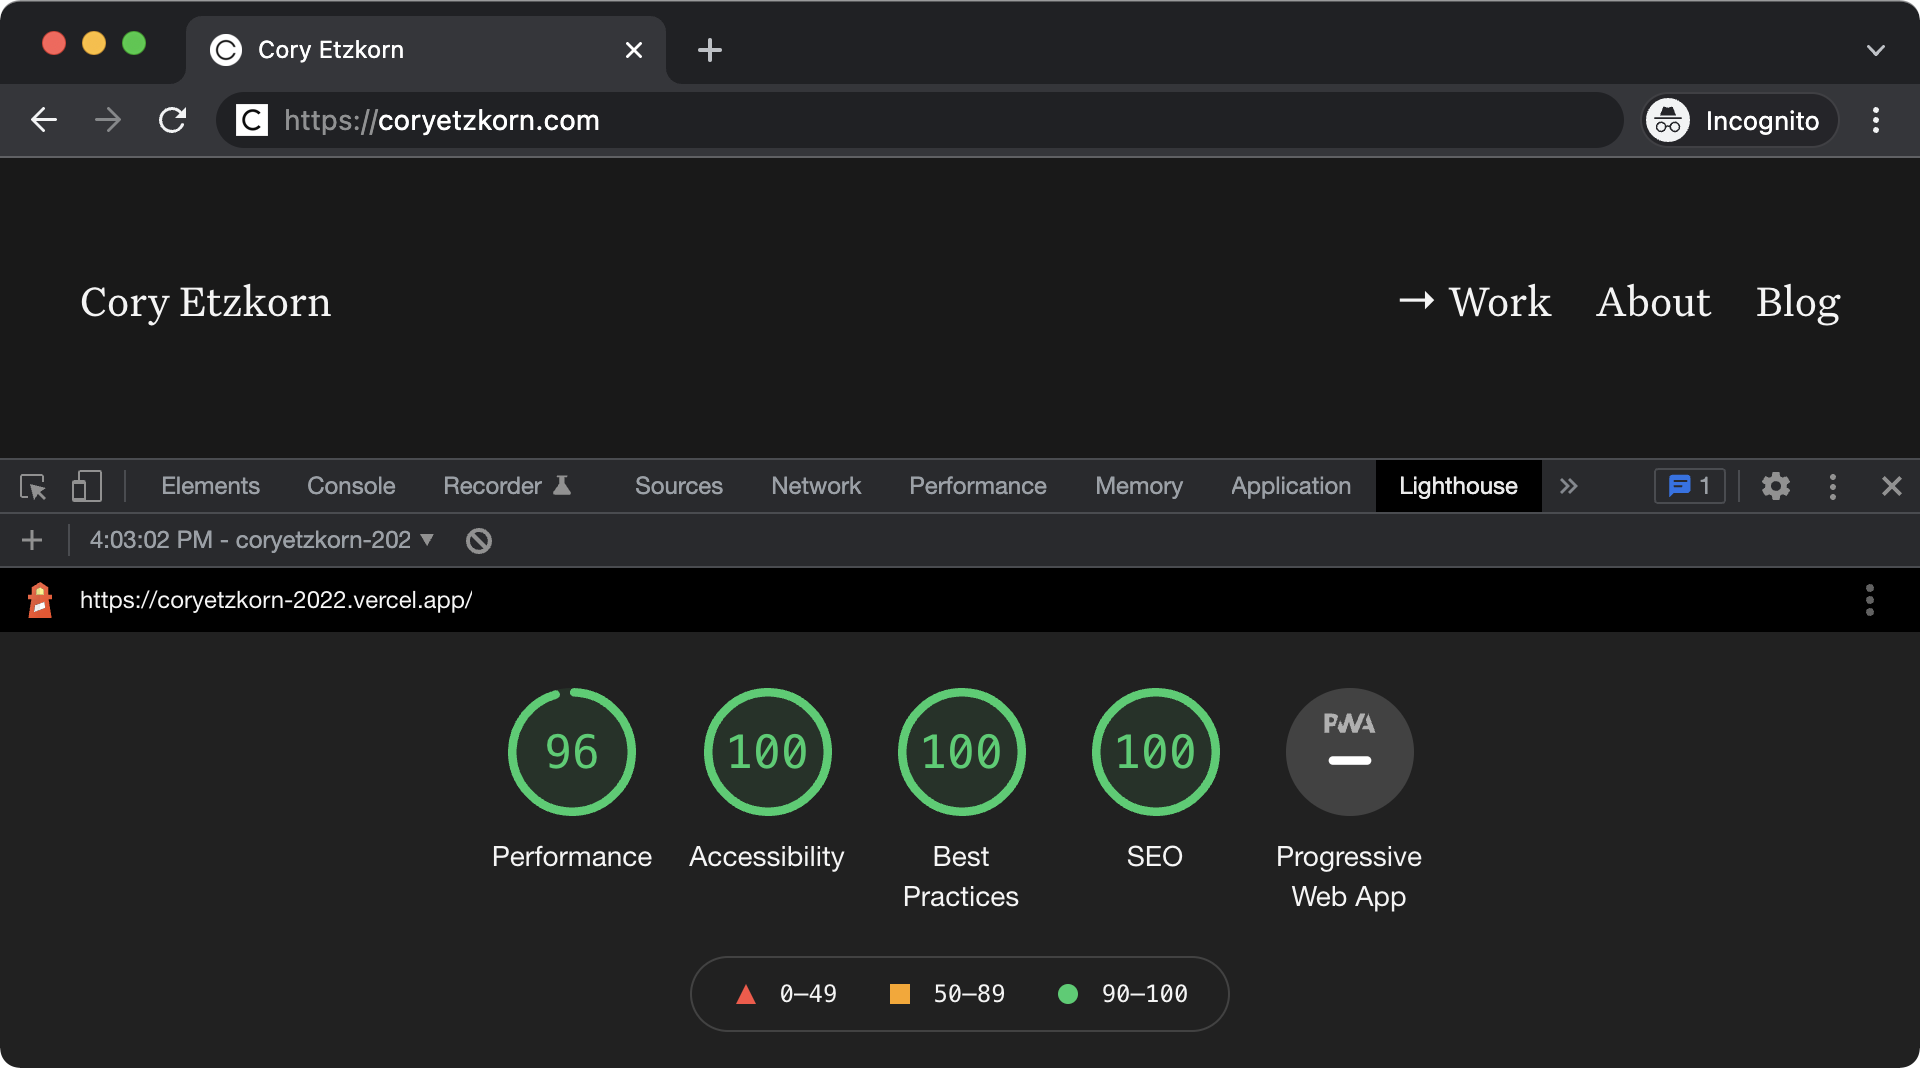
I’m also very happy with my new Google Lighthouse scores! Performance is a feature and the Next.js + Vercel combo really works magic here.
Closing Thoughts
I am really really excited about my new blog. The Notion API is flexible and easy to work with, so I didn’t have to make many design compromises to support this particular tech stack. My blog looks totally custom and polished to the point that no one will know it’s just a Notion database under the hood.
I’m even more excited to start publishing directly from Notion. There’s no way I won’t blog more now that the barrier to publishing is so low.
If you’re thinking about moving your blog to Notion, I hope this serves as evidence that you can and probably should. While my particular implementation is rather technical, there are plenty of low and no-code tools emerging that can help you achieve a similar outcome. super.so and potion.so come to mind. Or, heck, just publish your Notion database directly to the web.