Building a Figma Plugin
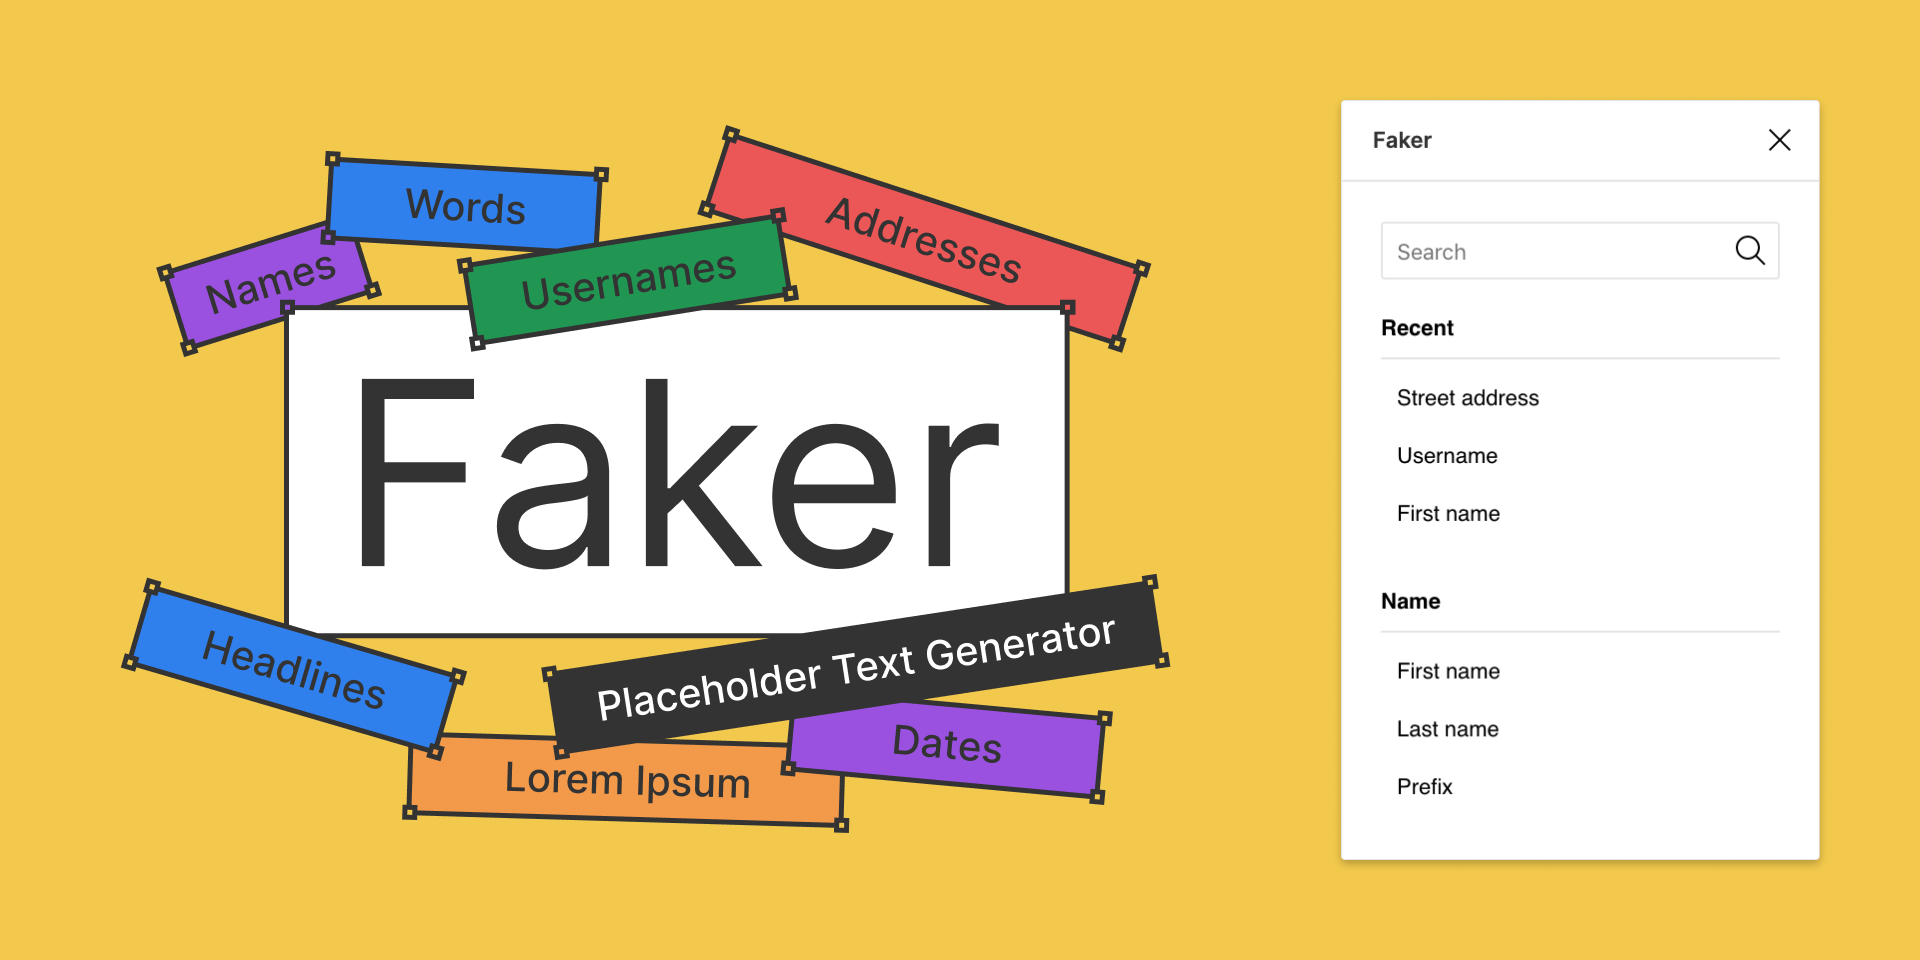
This week I published my first Figma plugin. It’s called Faker and it’s a simple UI built around the popular JavaScript library faker.js.
Figma plugins were only just introduced this past August, so the technology is still in its infancy. While Figma has done an excellent job documenting the development process, there aren’t too many other resources out there on the web. This is a quick look at my experience building and launching my first plugin.
Setup
I was really impressed with the setup process. I found it surprisingly lightweight and approachable — something a new coder could grasp intuitively. No small feat.
All you have to do is:
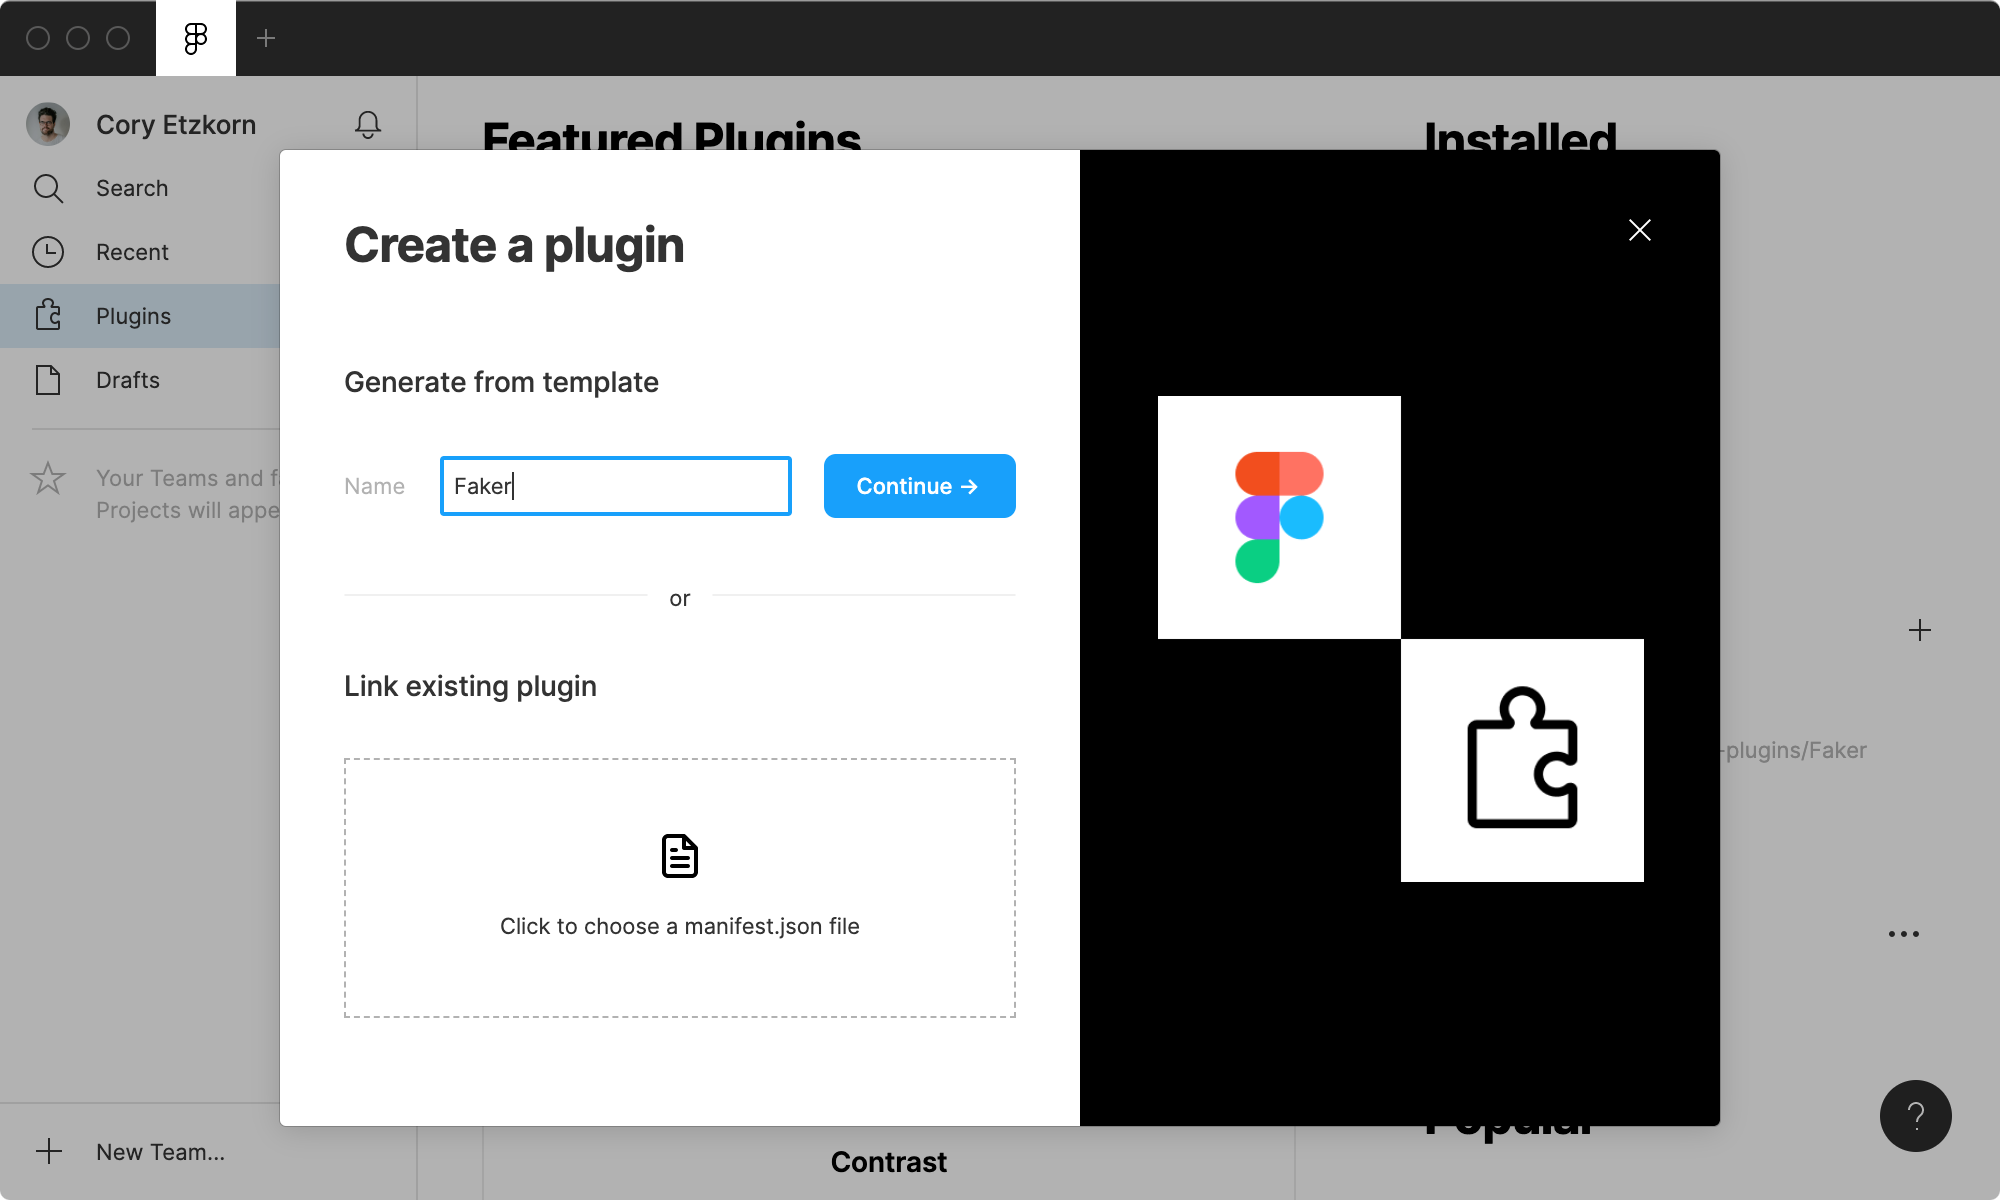
- Open the desktop app
- Switch to the plugins tab
- Click the little plus icon to add a new plugin
You’re then greeted with a friendly UI that asks for the plugin name.
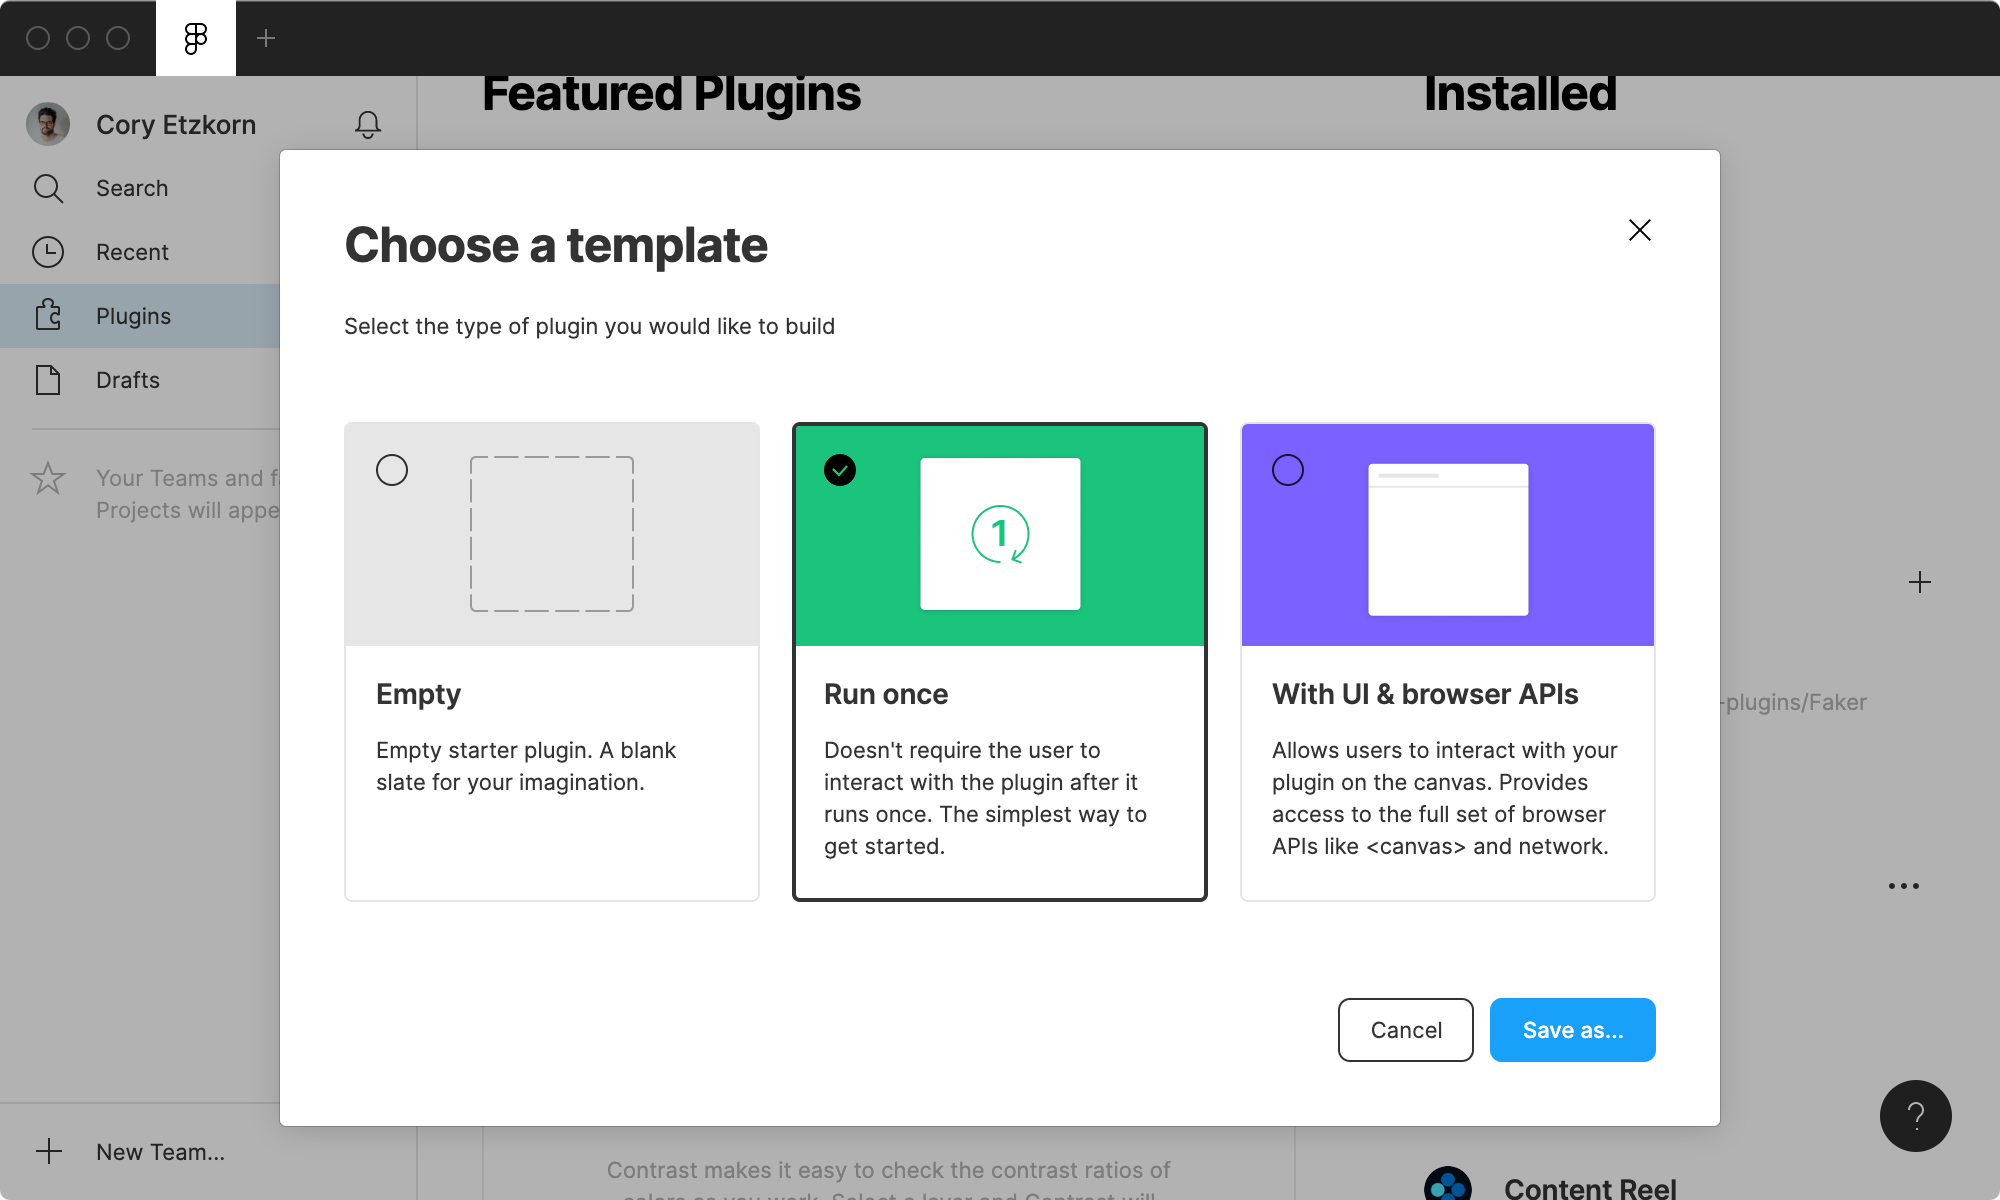
Next, choose between three templates: empty, run once, or UI + browser APIs.
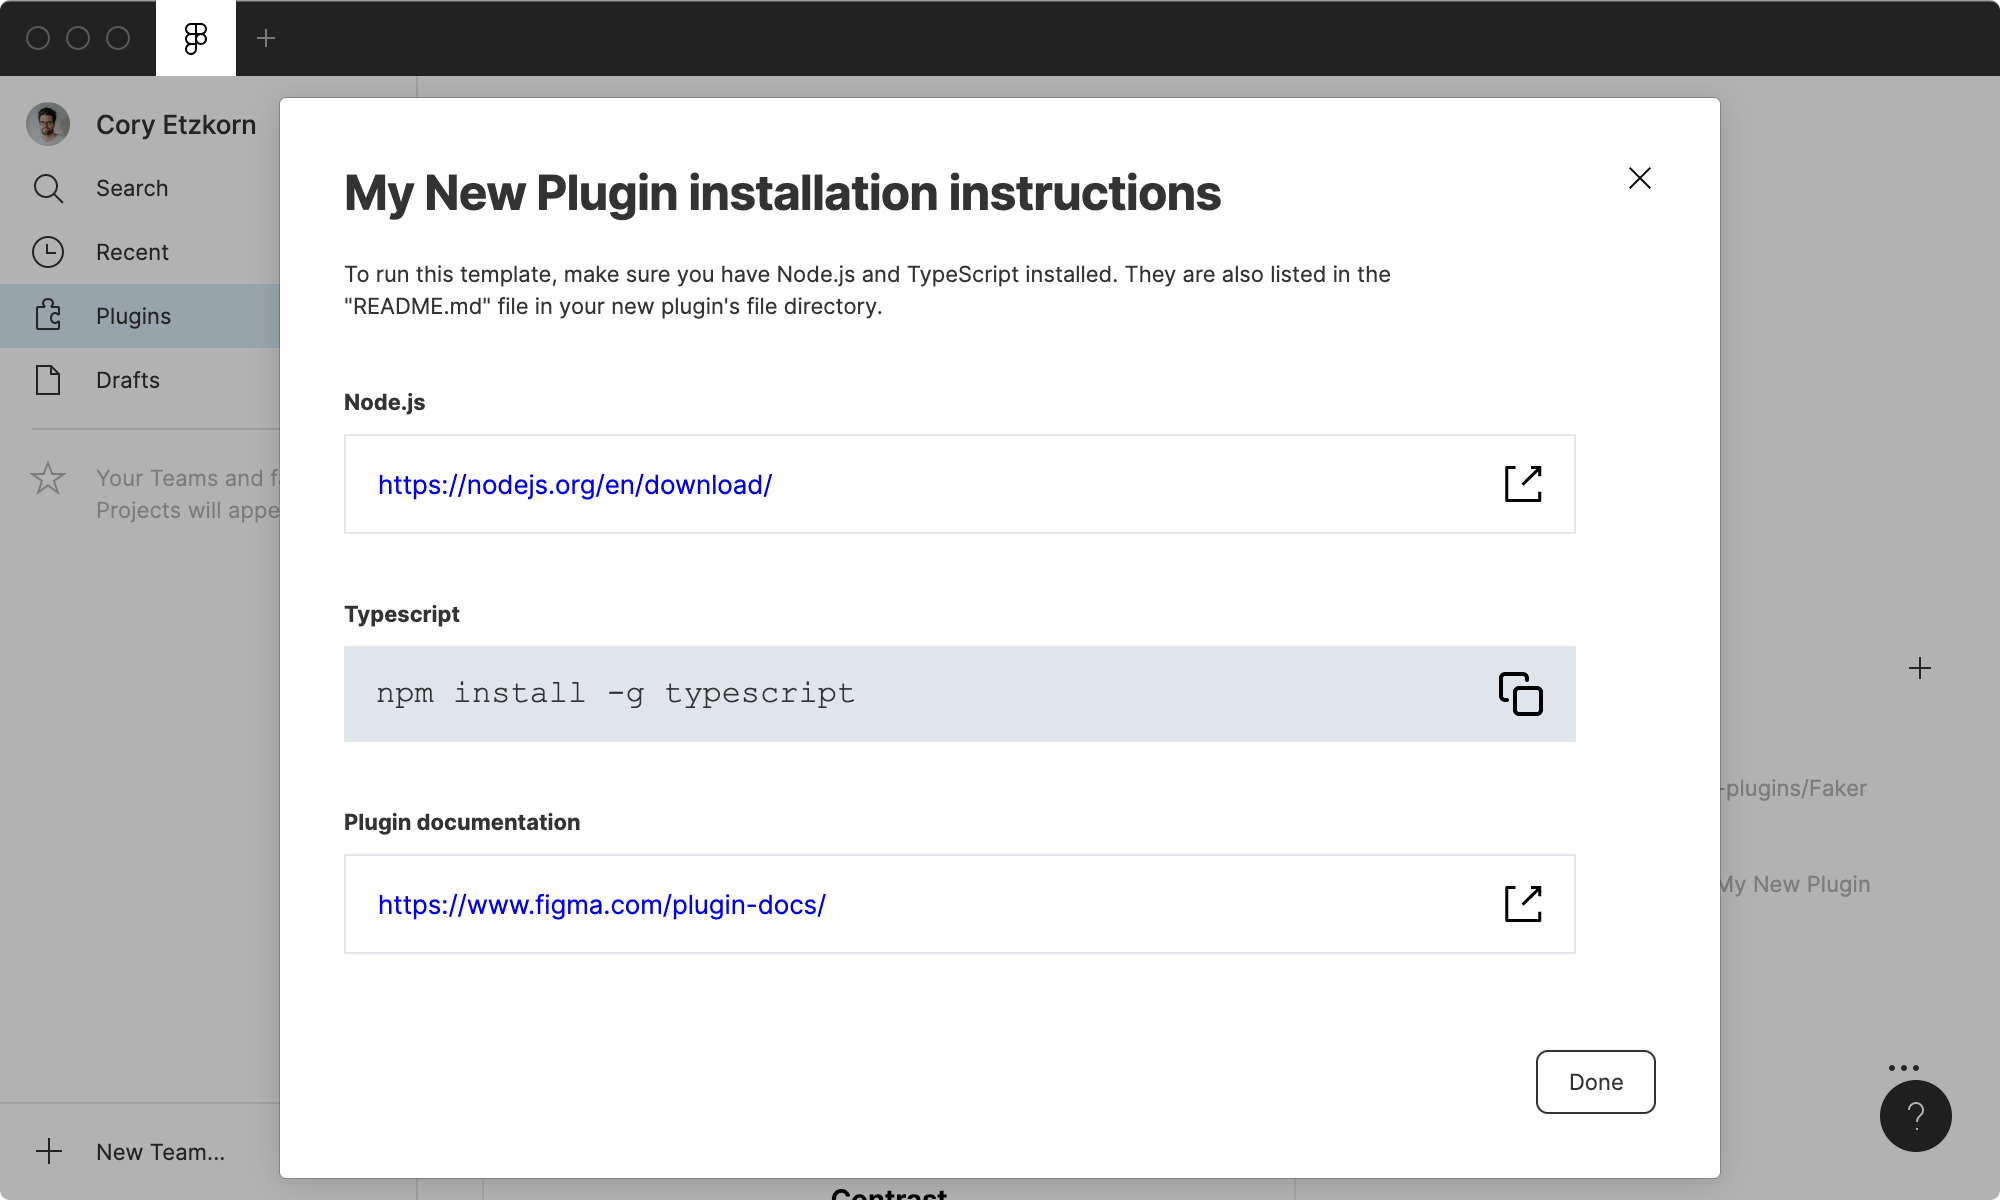
From there, Figma prompts you to choose a location on your hard drive and creates a directory with everything you need (for a basic plugin) on your behalf.
Development
So far, this has been a totally painless and, frankly, groundbreaking process for creating code that will soon be manipulating complex graphics.
The final step of plugin onboarding instructs you to install TypeScript. Maybe we don’t know what TypeScript is, but this command looks simple enough.
Ok, now we’re on our own. No more onboarding, just some files in a folder, which is to be expected. We are developing a plugin after all.
Let’s dig in. Only 6 files. Way simpler than I expected. And somehow this is all working without a giant node_modules directory or a package.json. Interesting.
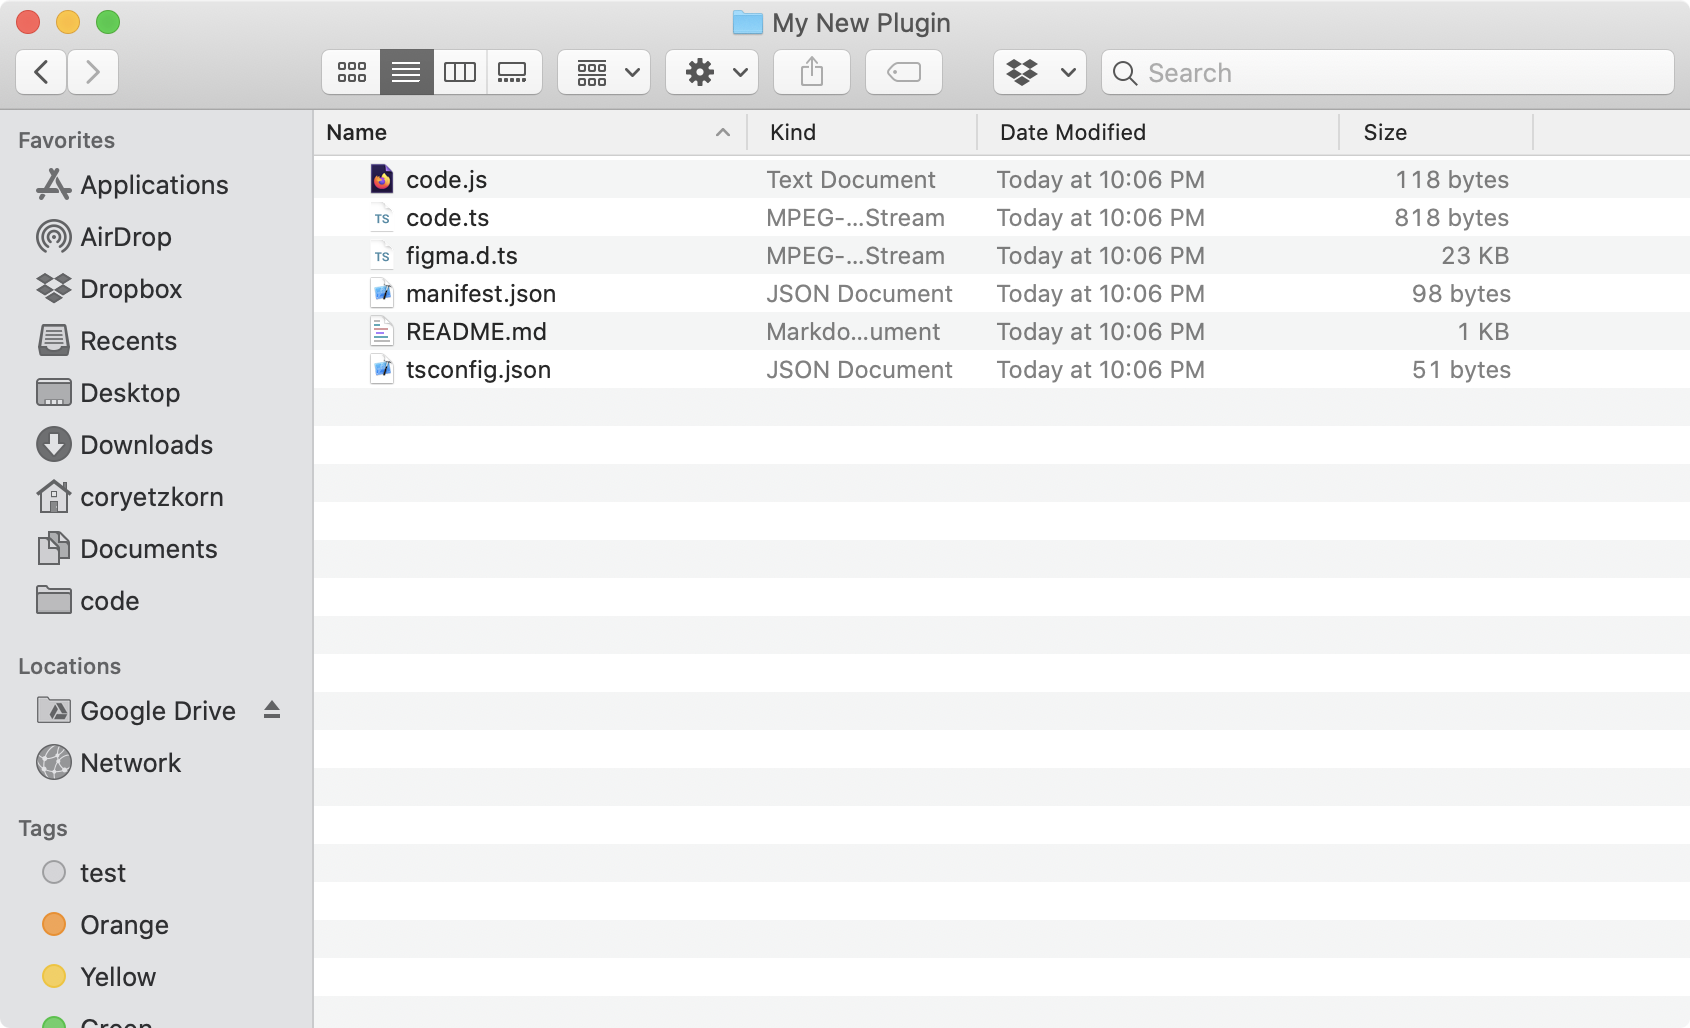
So what are these 6 magical files?
code.js— This is the compiled plugin.code.ts— This is the plugin source code. All of it. In one file.figma.d.ts— Type definitions. No need to modify this.manifest.json— Manages the plugin’s identity.README.md— Helpful instructions / the continuation of onboarding.tsconfig.json— A configuration file you likely won’t touch.
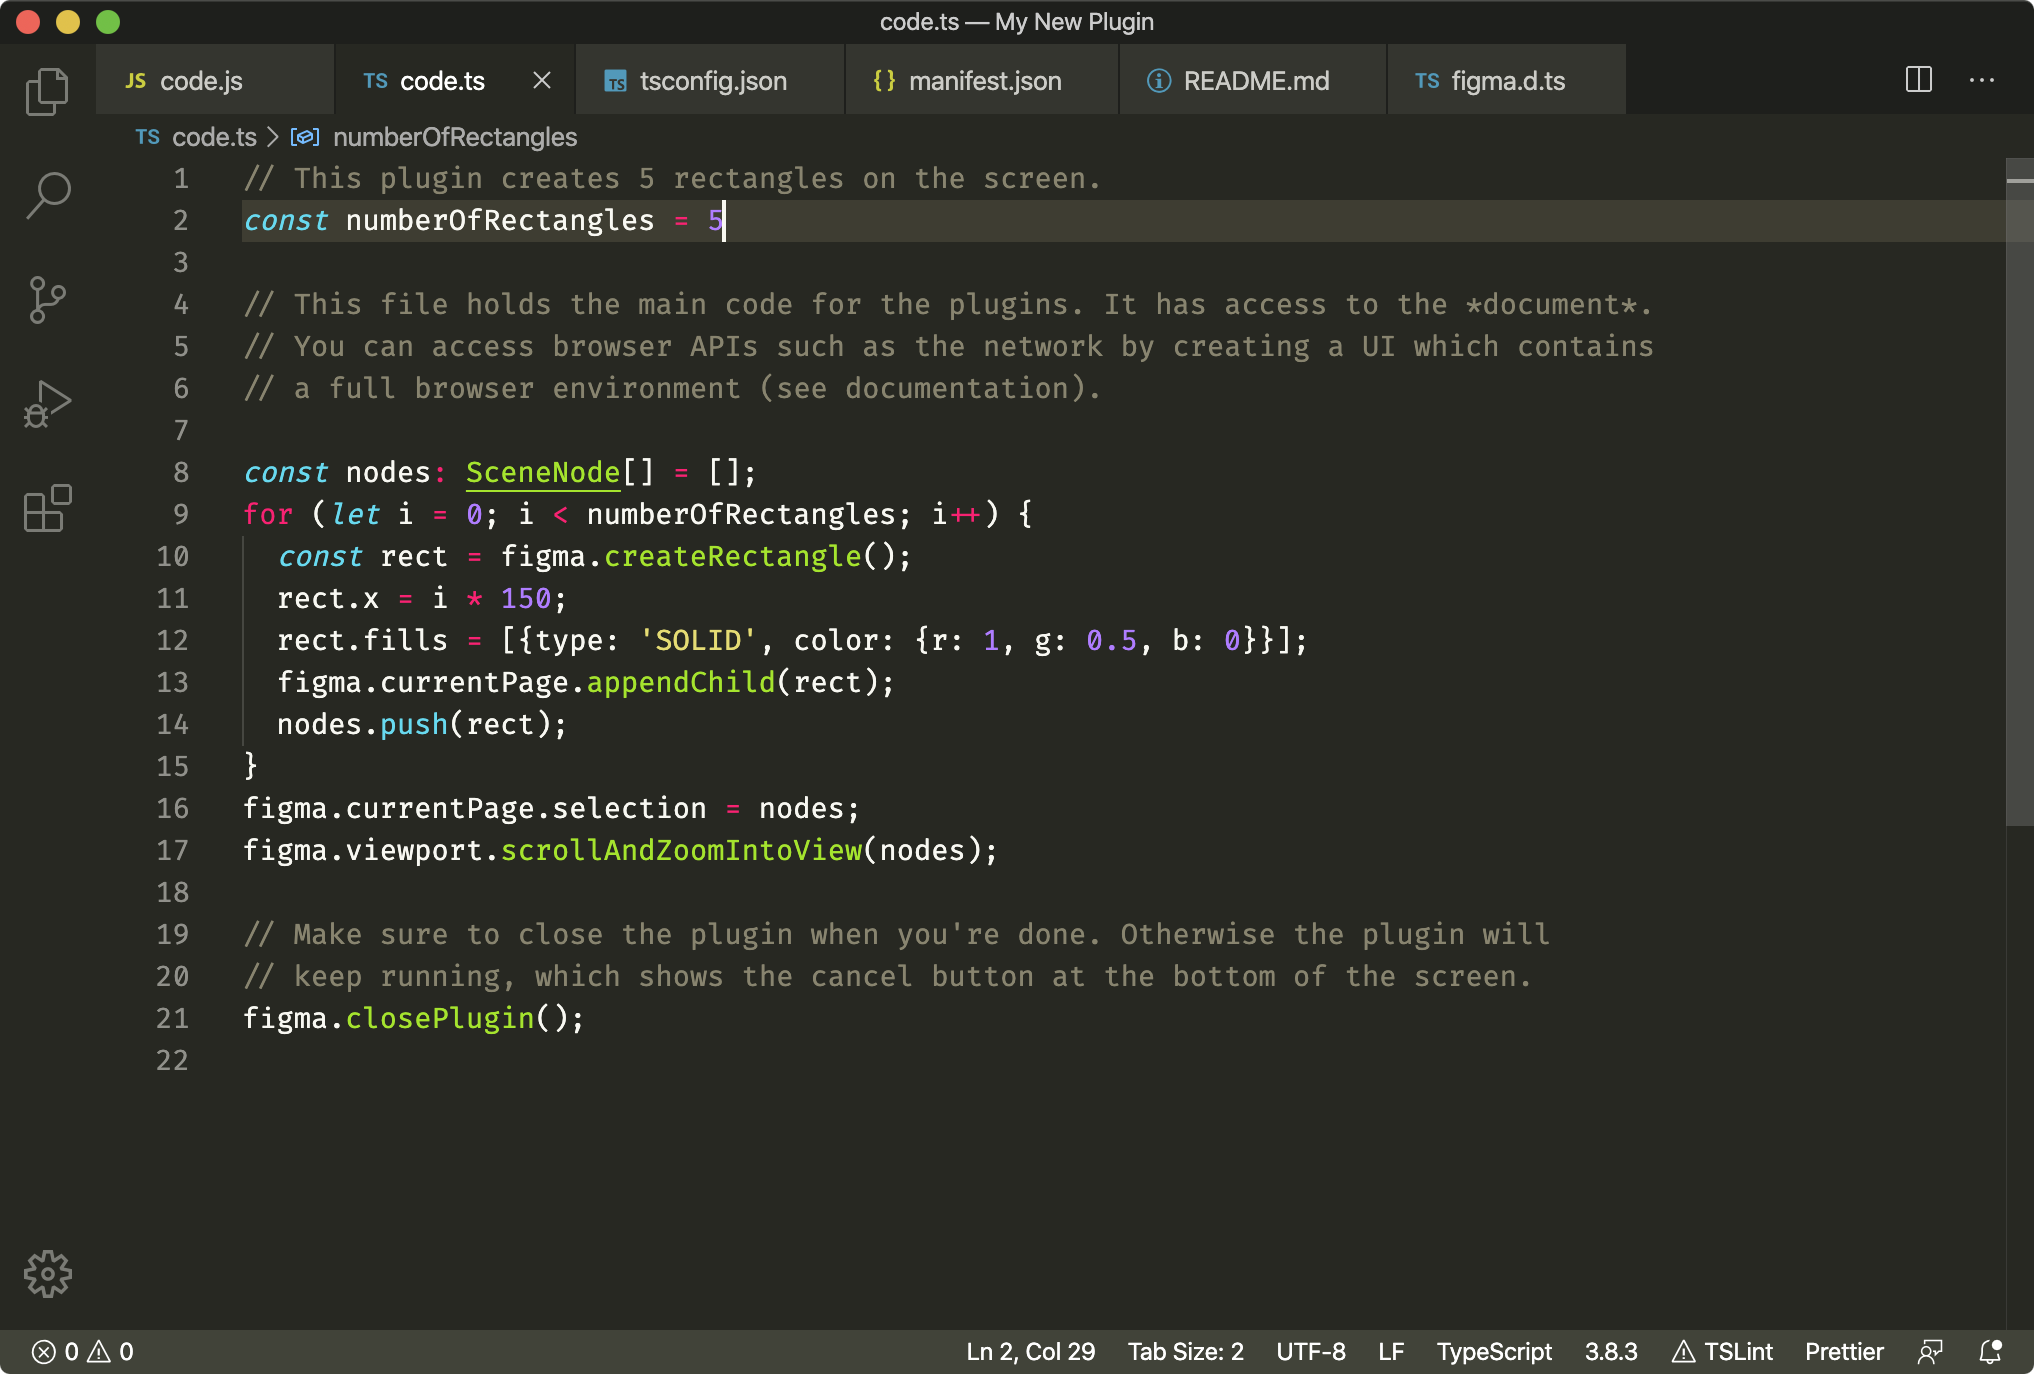
Really, the only thing you need to understand here is code.ts. It’s only 22 approachable lines of code, 6 of which are contextual instructions.
This sample plugin creates 5 rectangles on the screen. You can even try it for yourself in Figma after running a simple build command (instructions in README). I found it satisfying to run the build so early on in the process.
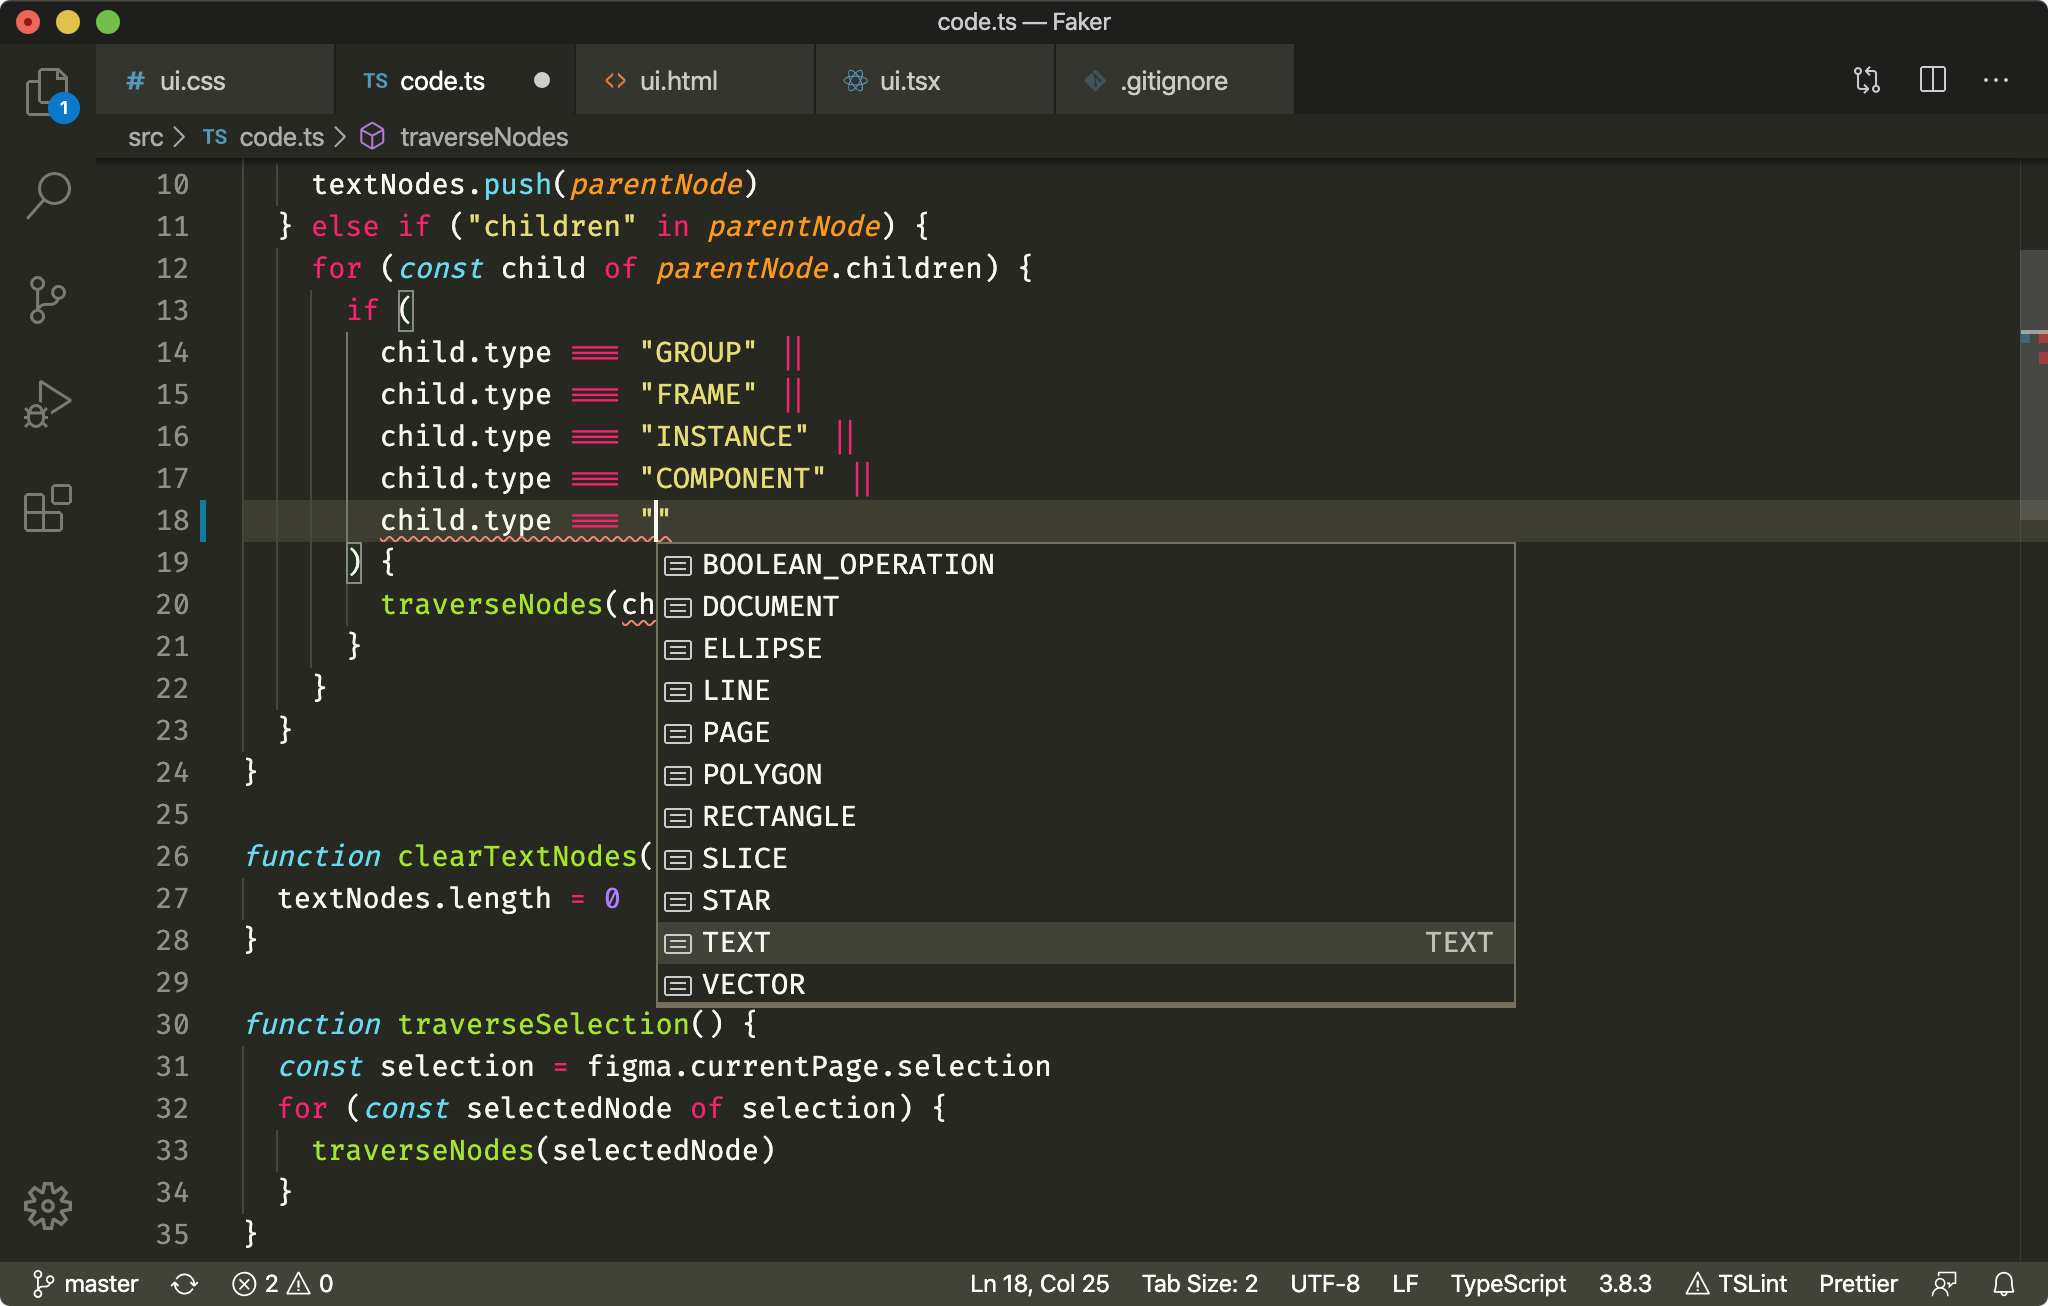
This is a TypeScript file, not vanilla JS. That could be barrier for newer developers, but it also makes the development experience infinitely more pleasant. If you’re interested in learning more about TypeScript, I wrote a whole post about it.
The beauty of TypeScript is that it self-documents. For example, in Faker, I run some code that checks to see what types of elements are in the selection. TypeScript provides autocomplete suggestions automatically so I don’t have to guess. Without this, I would have assumed a star and a polygon are the same thing, when they’re actually not. Now I know.
I’m not going to get into the specifics of coding a plugin in this post, but here are some great resources you can reference:
A basic plugin can be barebones and have no UI aside from a menu command. This is the approach the rectangle example takes and it accomplishes everything with just a few lines of code.
There’s also the option to get fancy and build out a full UI like I did for Faker. If you go the UI route, the technologies you use are totally up to you. Vanilla HTML, JS, and CSS works just fine. I opted for React because my plugin had a fair amount of state, but it was most definitely overkill.
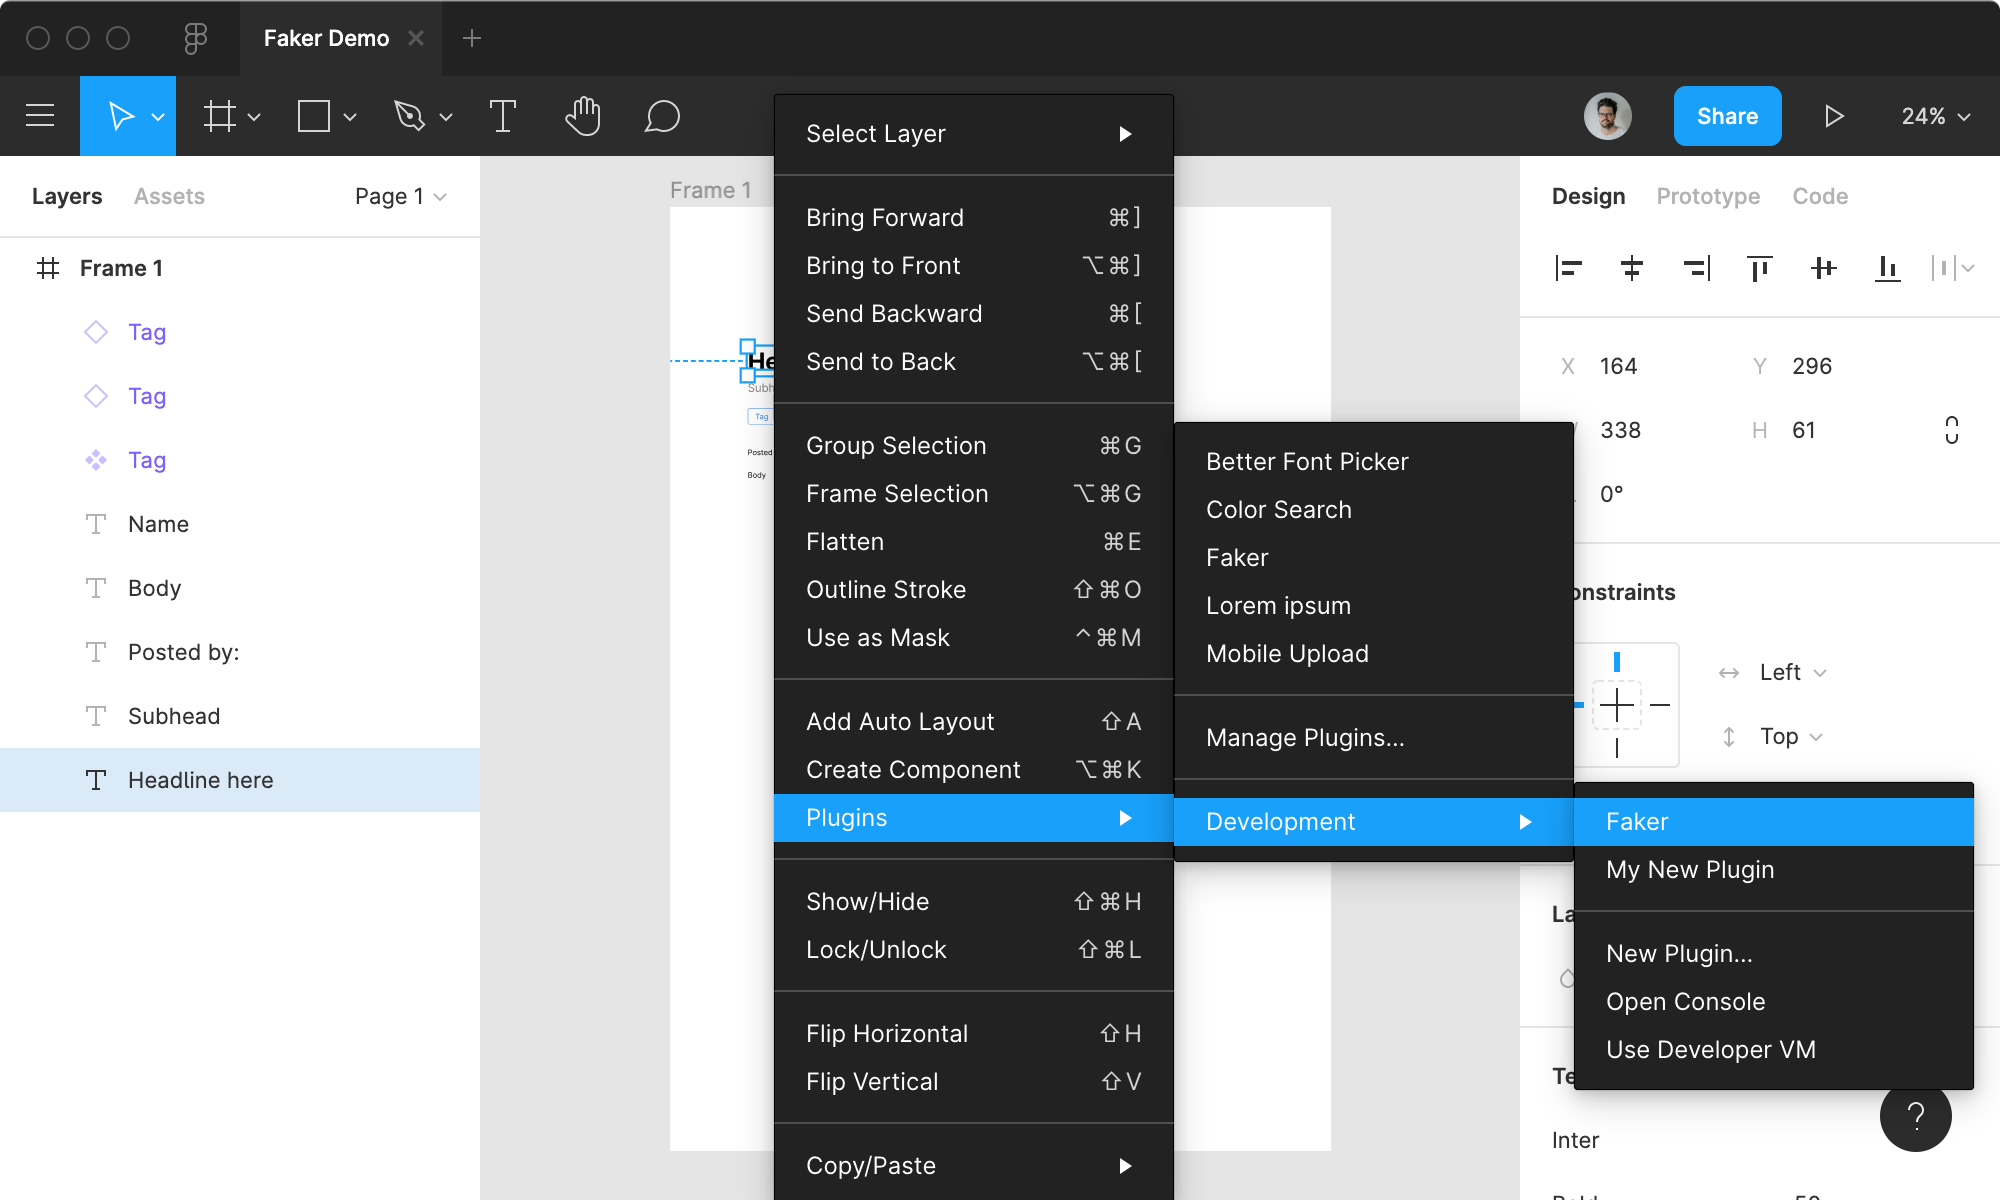
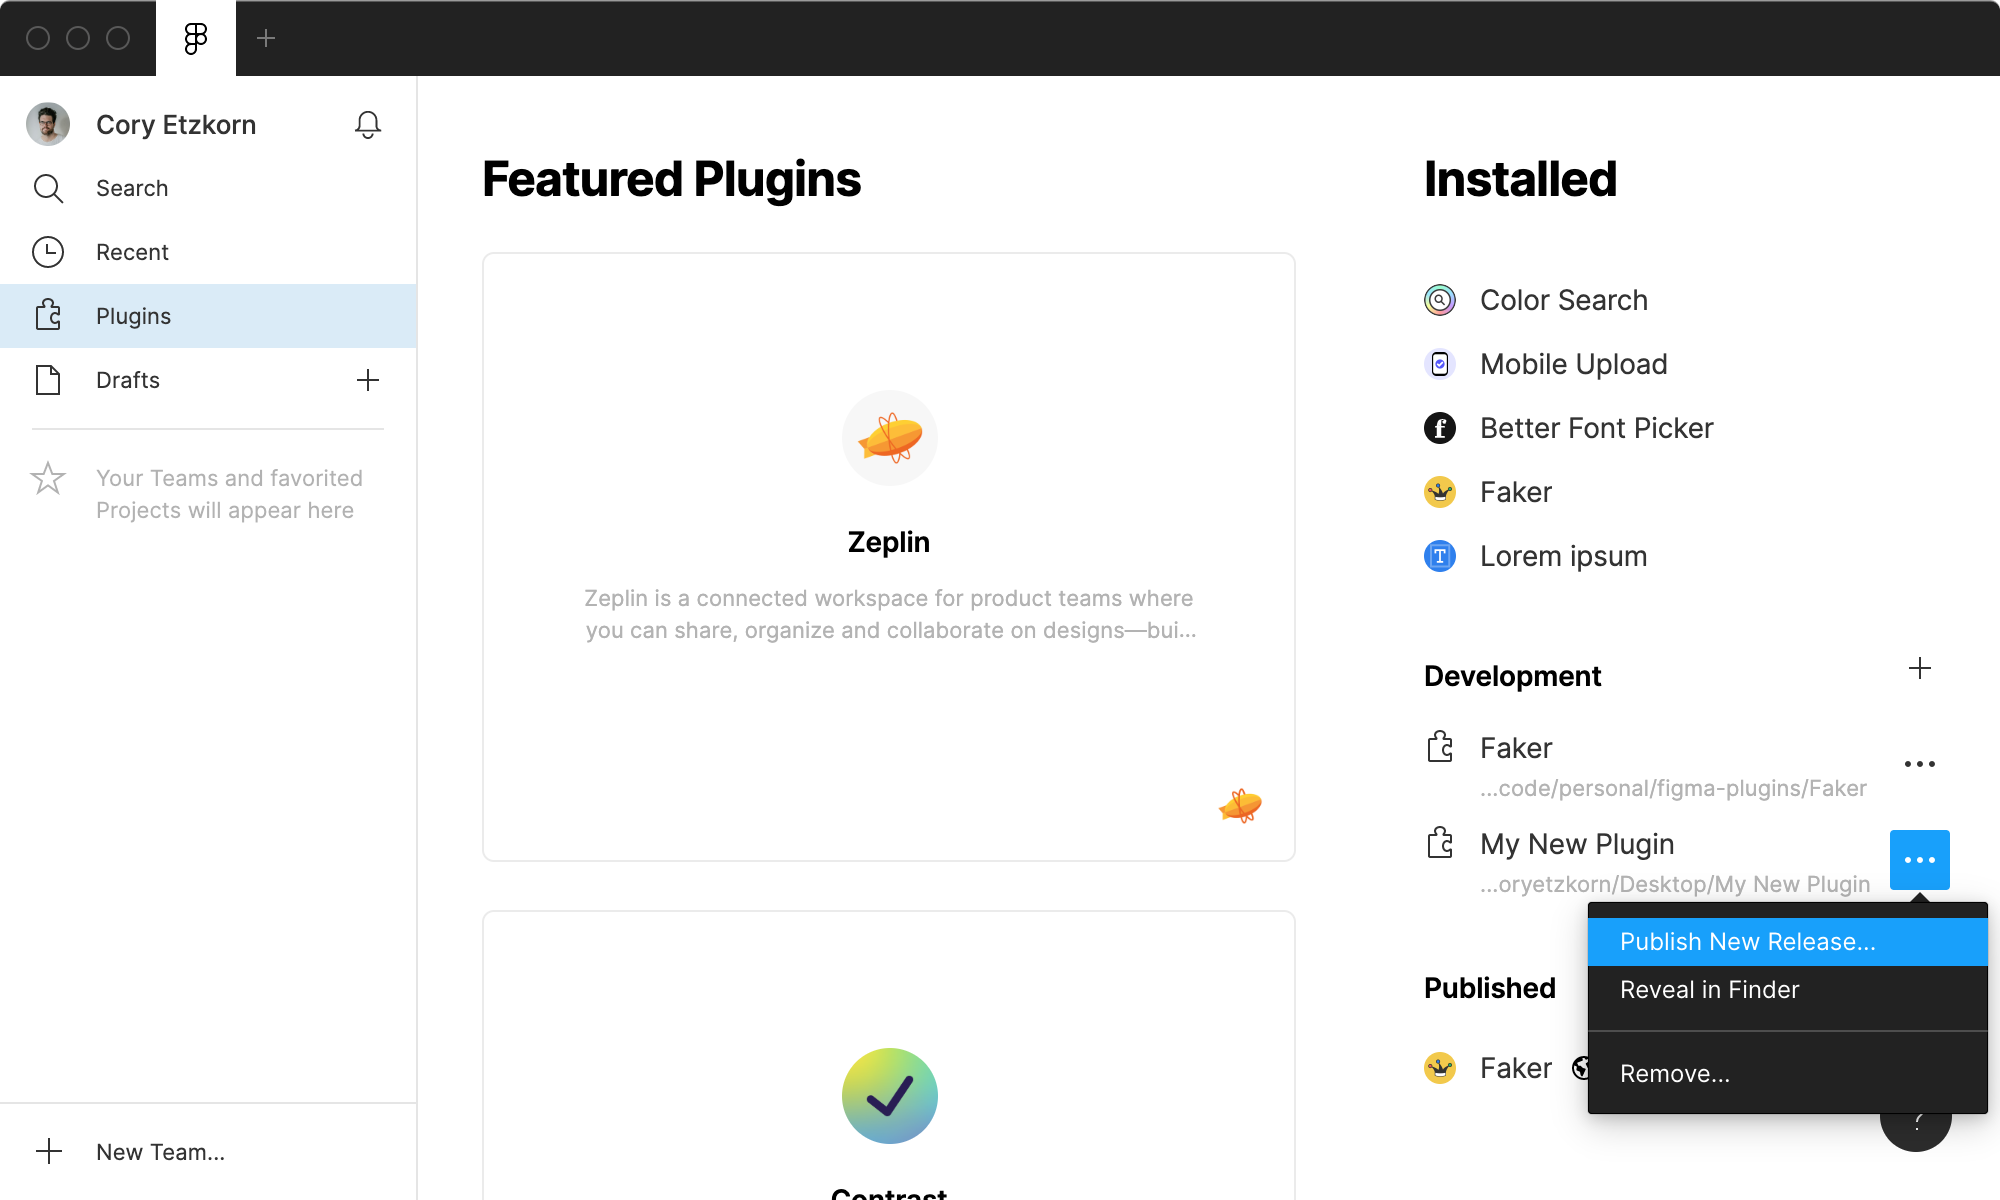
When you’re ready to give your plugin a try, it can be easily accessed from Figma by navigating to Plugins → Development → Your Plugin.
If it works, congratulations! If not, back to the code we go.
Publishing
When you’re ready to share your creation with the community, publishing a Figma plugin is quick and easy. Simply click “Publish New Release” in the UI.
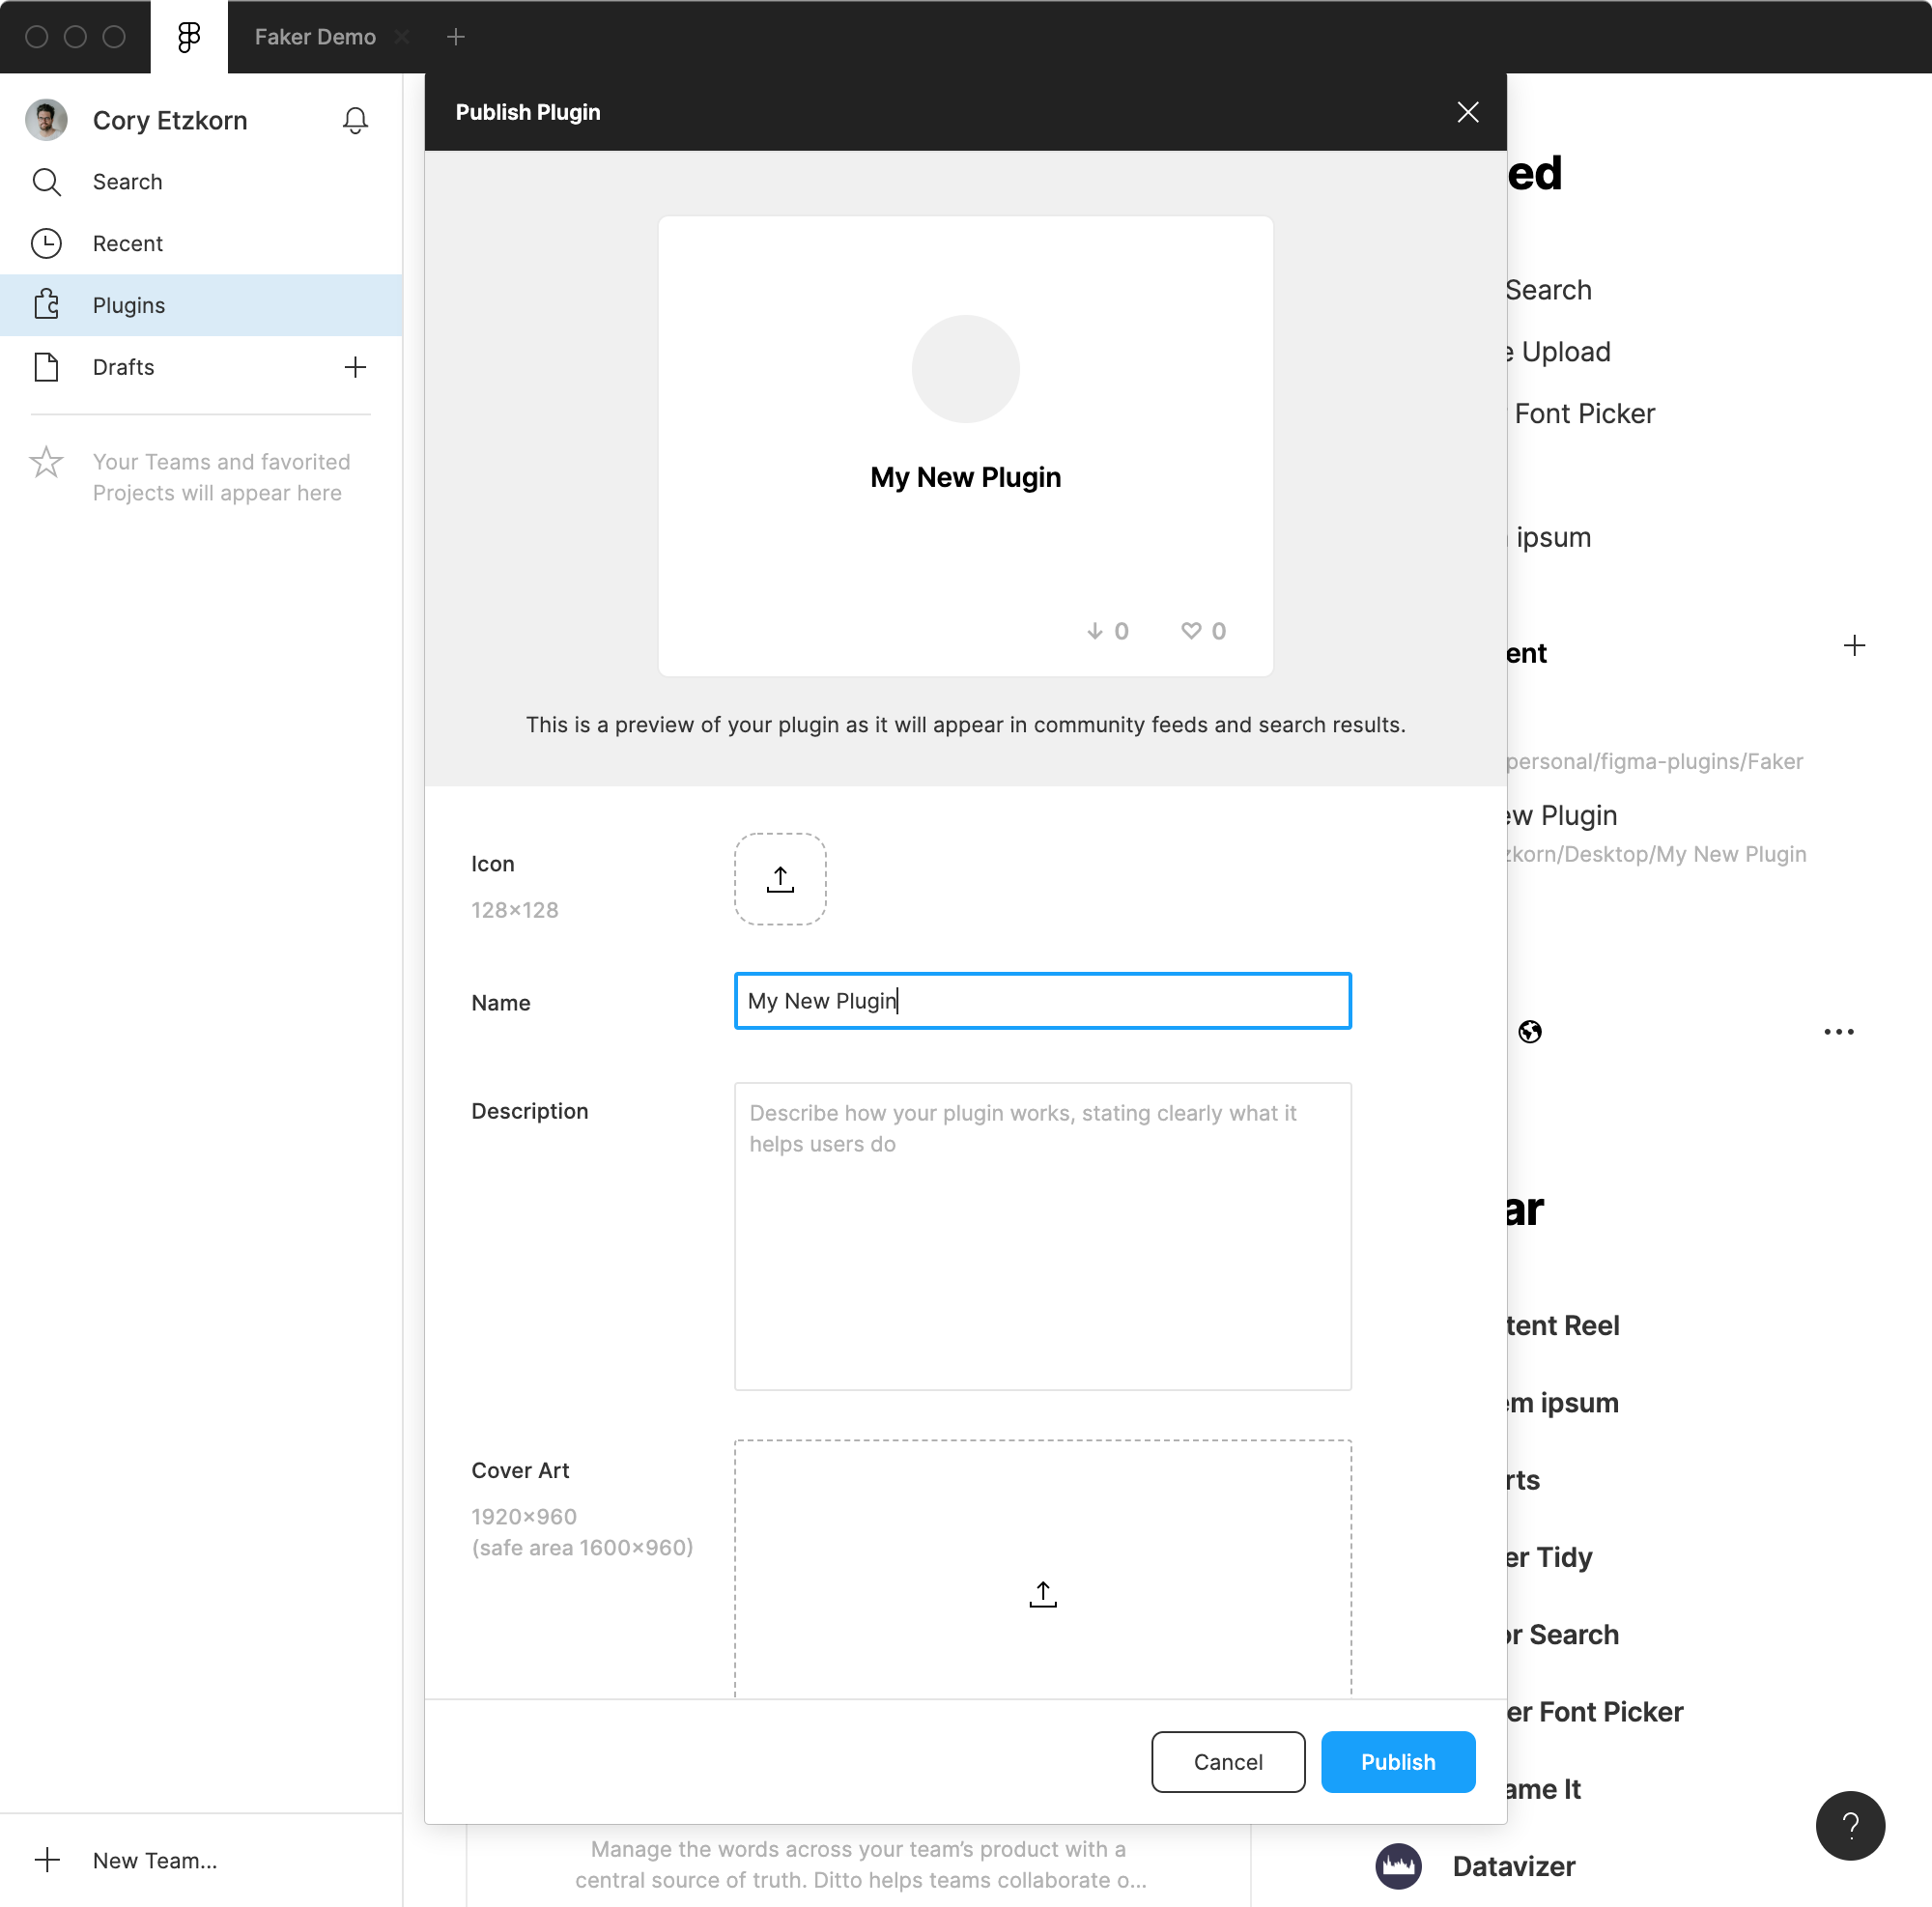
You’ll be greeted with a dialog that asks for supporting assets like an icon, description, and cover art.
Tom Lowry make a sweet Figma template to help with generating these promotional assets. I recommend it.
Once you press publish, you’ll just need to wait a few days for review. Figma will either request technical changes or approve.
Note that the review process is fairly strict because Figma wants to keep the quality bar for new plugins high. I’d highly recommend reading their publishing tips before submitting. An excerpt:
“When developing a plugin, it’s reasonable (sometimes even advisable) to focus on the core use case of your plugin and make sure that it works when the user does what you expect. That’s the ‘first 80% of the work’. However, there’s often a ‘second 80% of the work’ needed to make sure that your plugin does something reasonable in situations that you didn’t expect.”
I certainly found that to be the case, but I also found TypeScript to be a helpful tool for ironing out those edge cases.
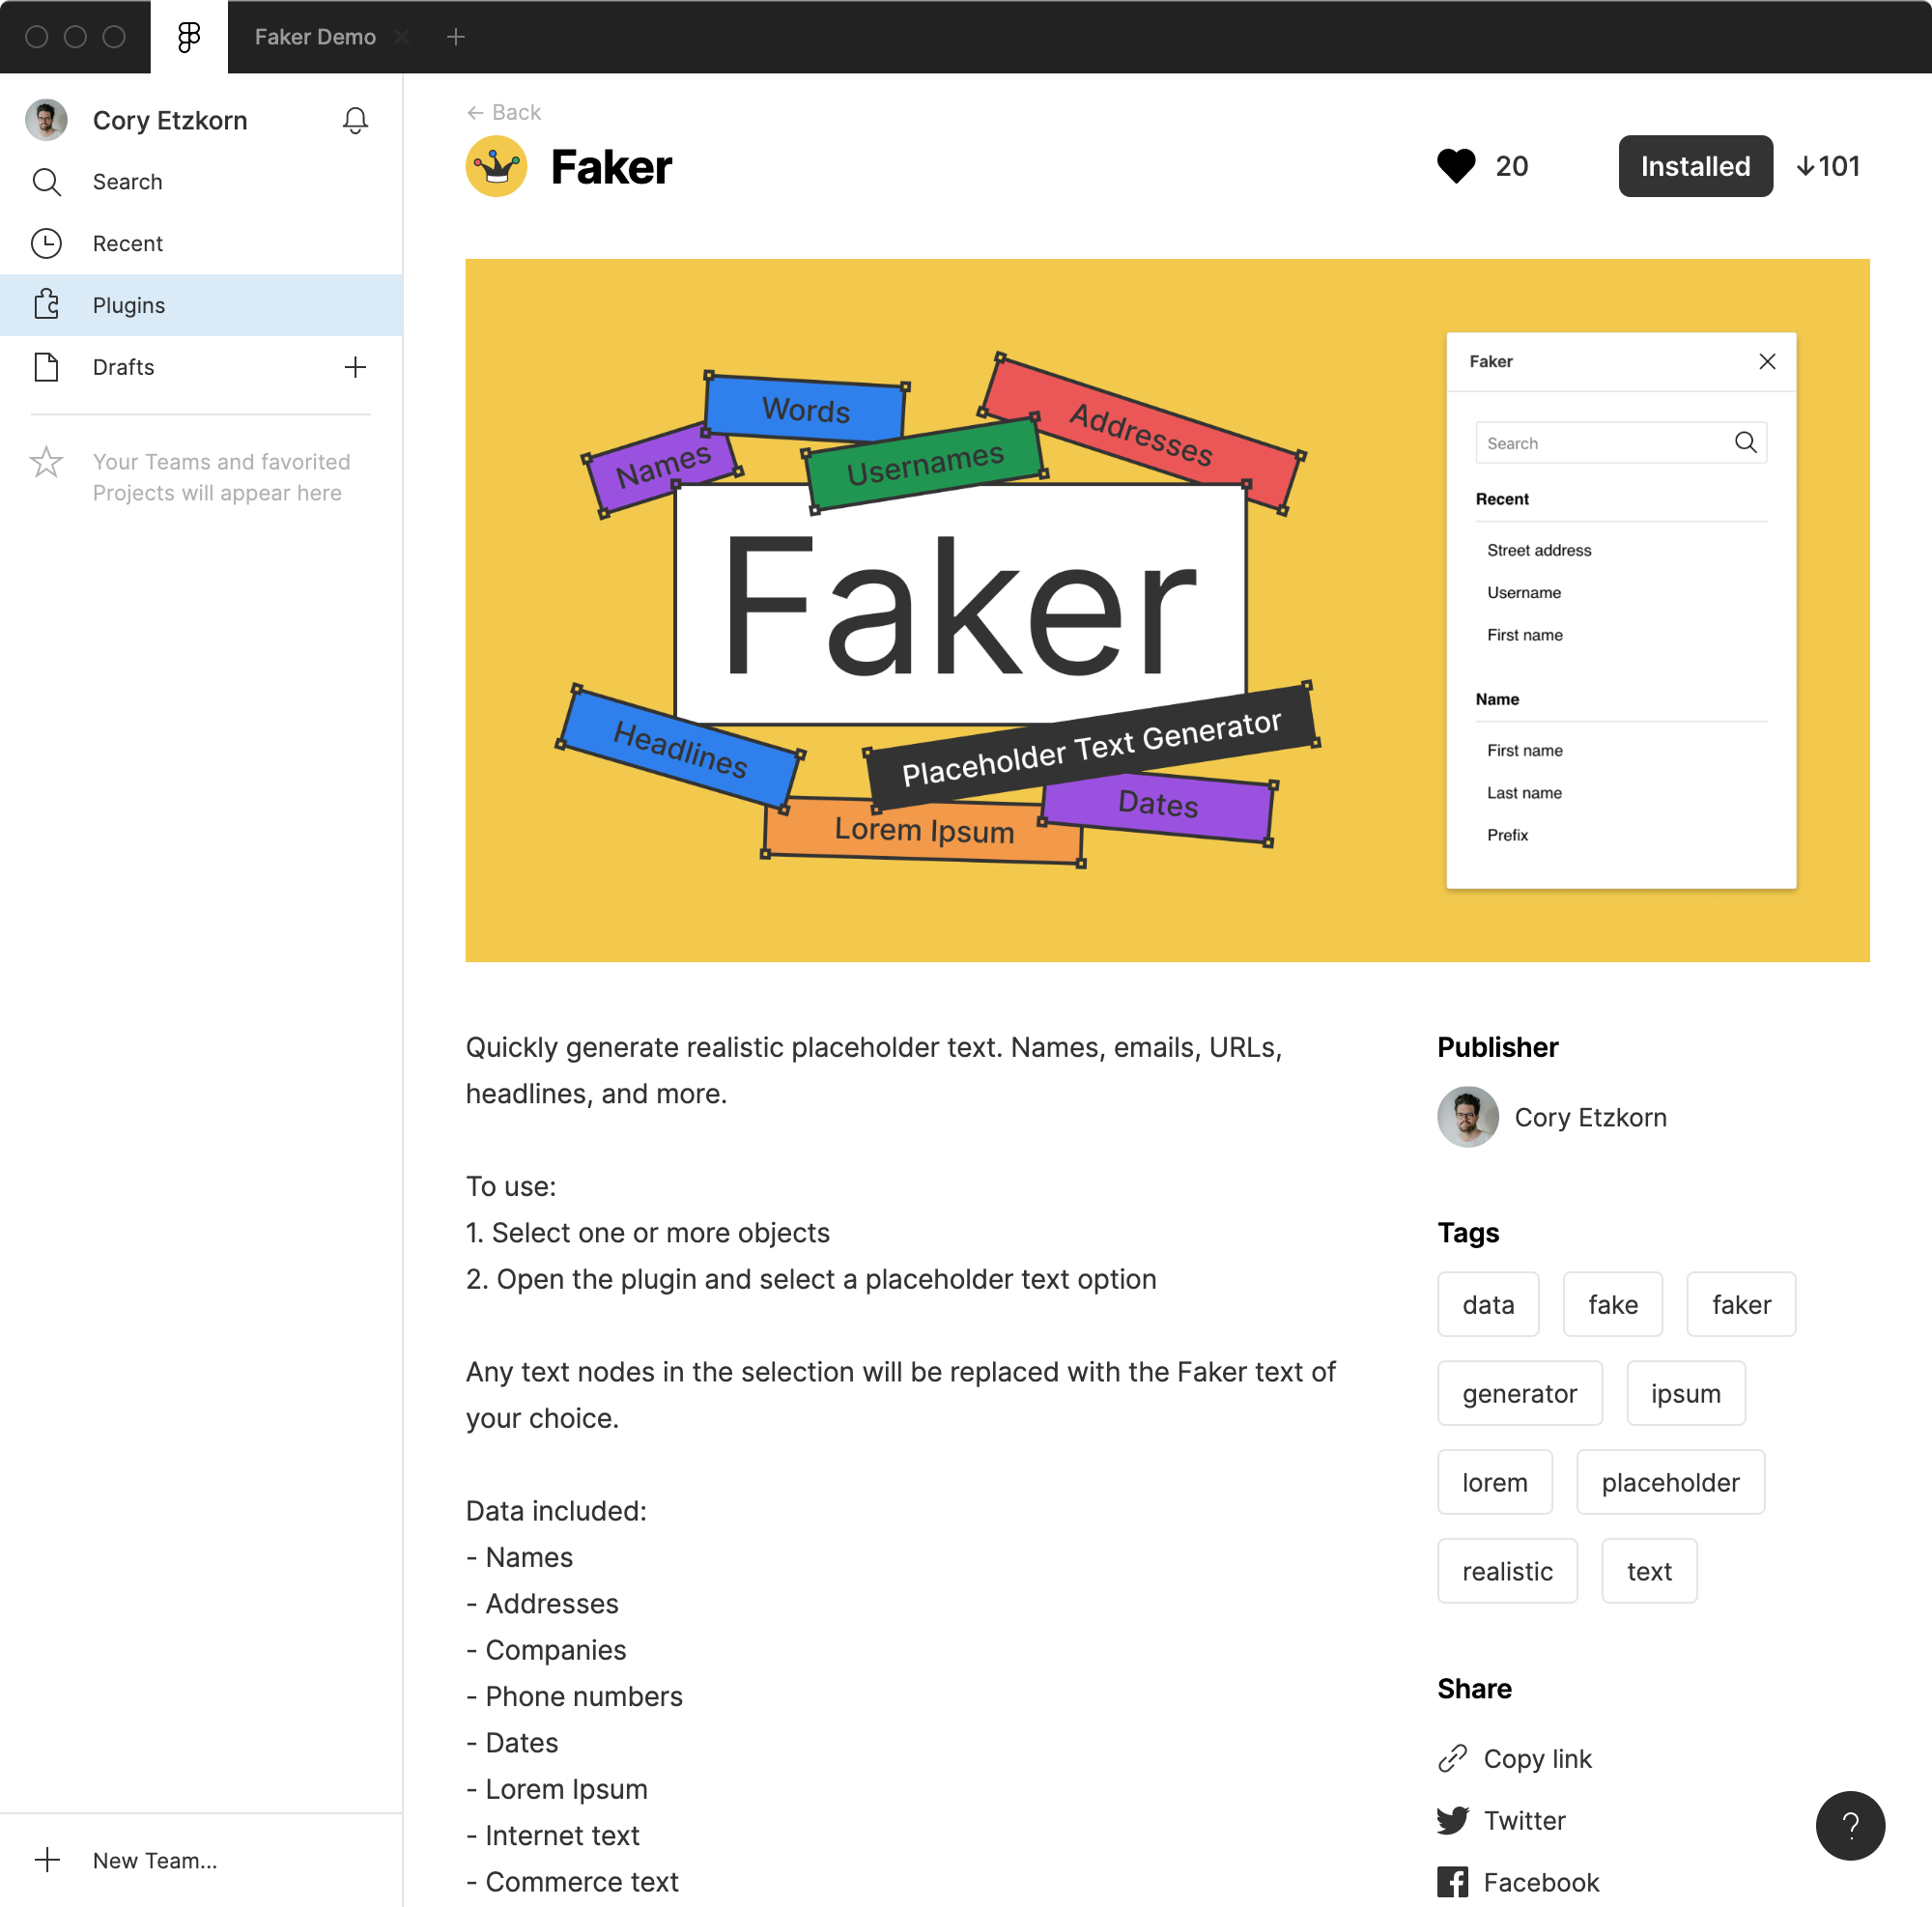
After approval, your plugin will show up in the public directory and it’ll have a fancy community page to match.
Impression
I was super impressed with the process of building a Figma plugin. The process felt approachable for a newer developer, but also configurable enough to please experienced engineers.
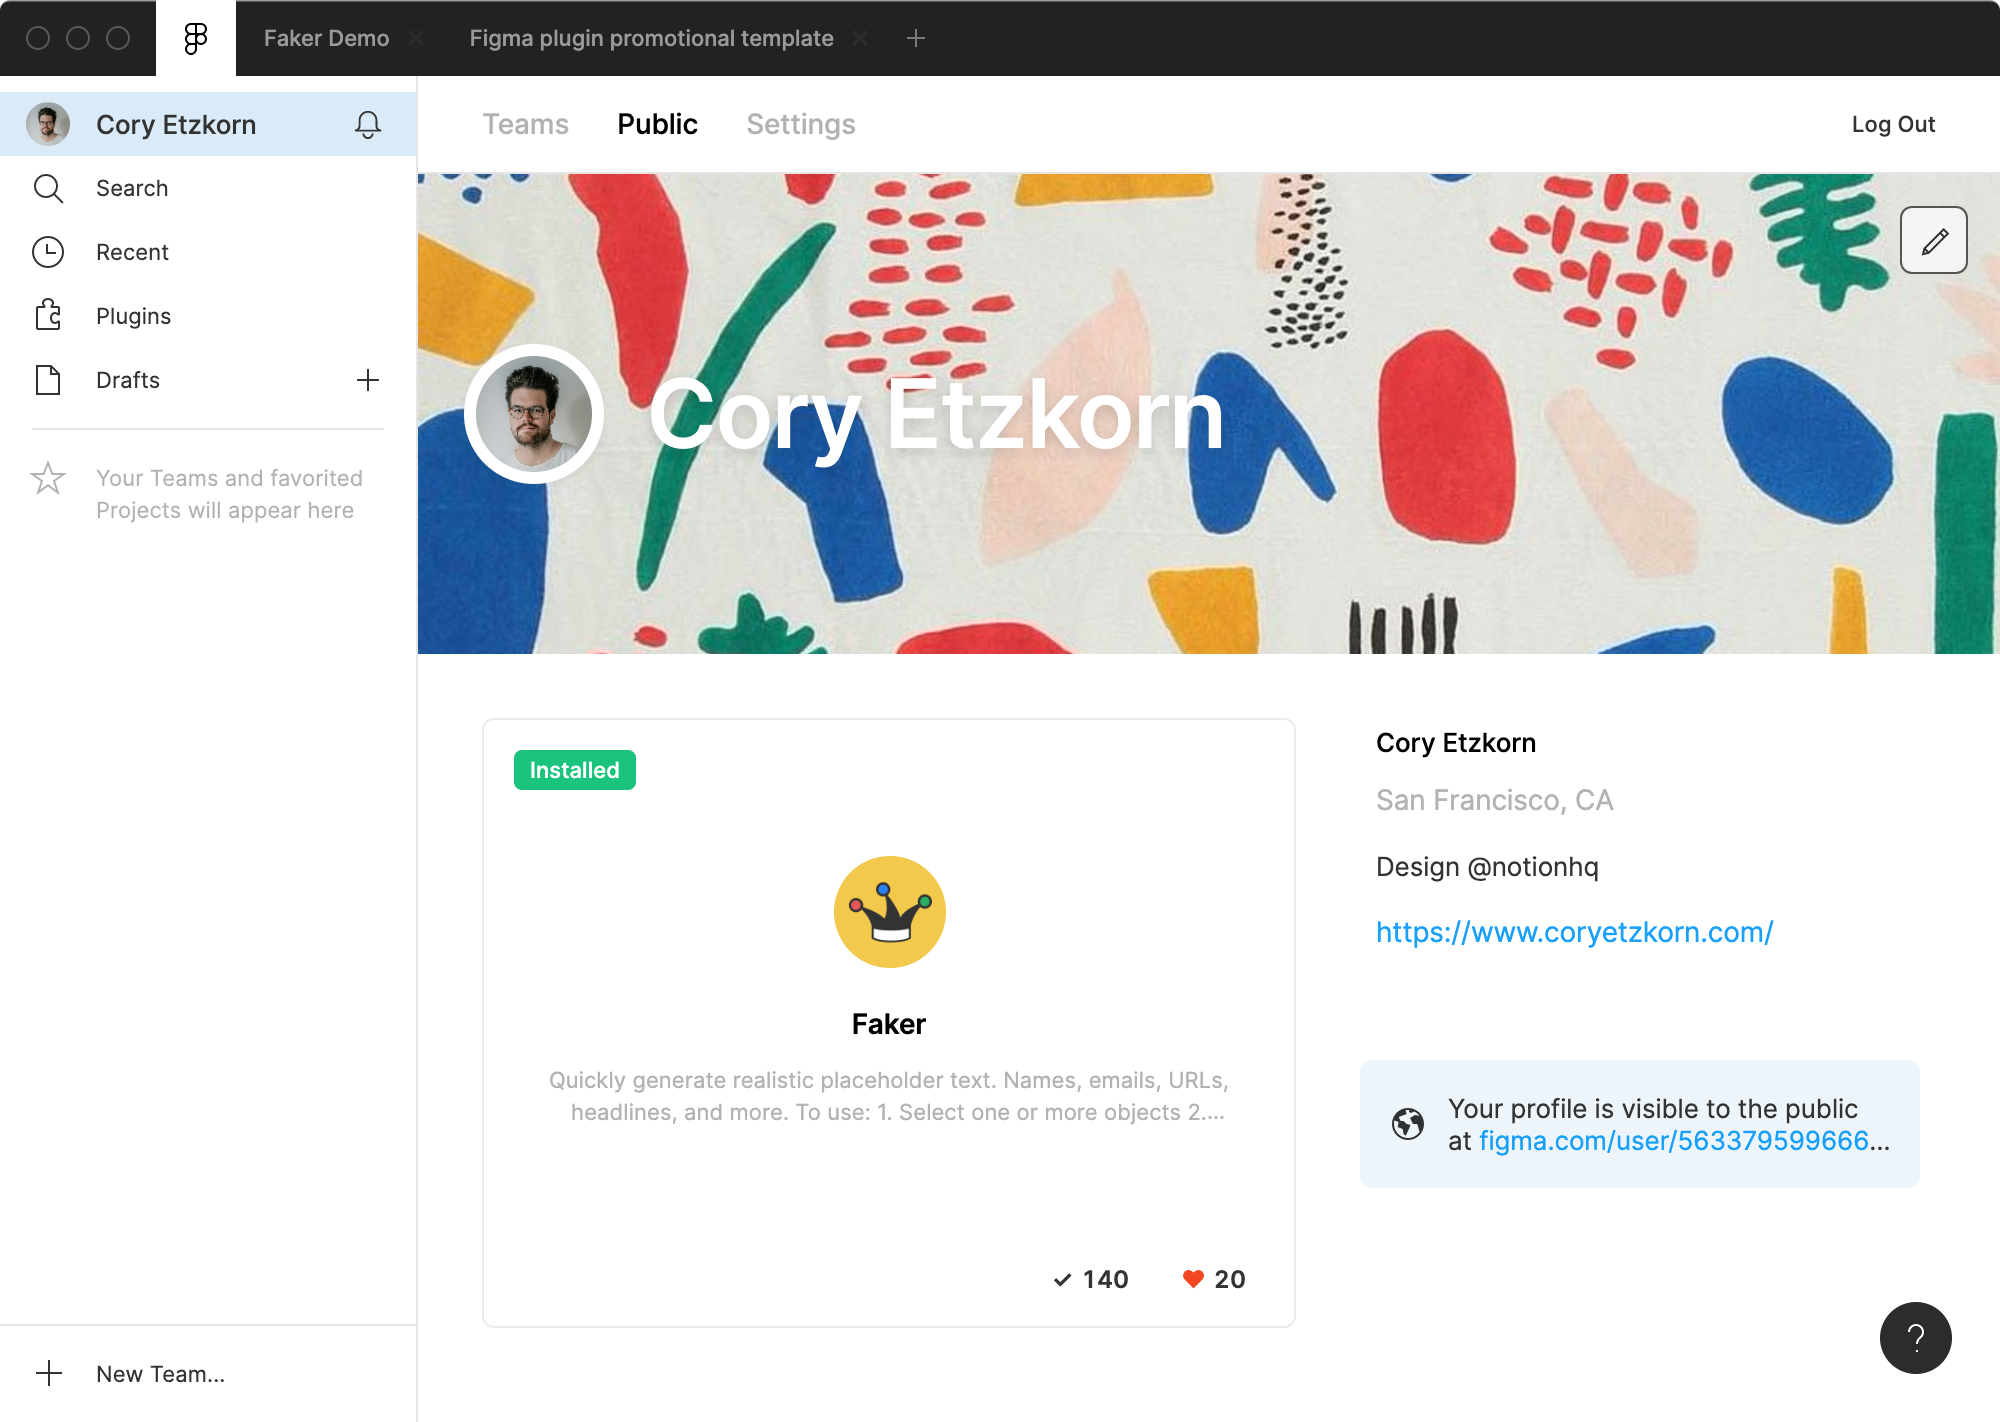
My favorite part of the process was seeing my finished plugin appear on my profile page. It reminded me of the early days of GitHub and the ethos that anyone, anywhere, can help shape the tools around us.
I’ve been dreaming of a “GitHub for design” for years and it’s exciting to see Figma pursuing that reality.
Wish List
I found there was very little I couldn’t do with the existing APIs and tools. Unless you’re building something highly complex, you’ll likely be able to make it happen.
Here’s a short list of things that could improve:
- The 3 code templates offered in onboarding are great, but I’d love to see that expanded to include Webpack, React, Vue, and Gulp configurations. I had to do some digging to get those working.
- I found myself always wondering if I was doing things the “Figma way”. Tasks like document traversal could be approached in multiple ways and I wasn’t sure if my implementation would be the most performant. Documenting best practices for common tasks would be neat.
- It was a bummer to see so many closed-source plugins. Would be nice to encourage people to link to public GitHub repos so others can learn from their code.
- I thought the API was quite permissive, but can’t hurt to expand it.